Her-Bivore Blog

 RSS Feed

Category: Snacks

  1. Overnight Oats

    Posted on

    Overnight Oats
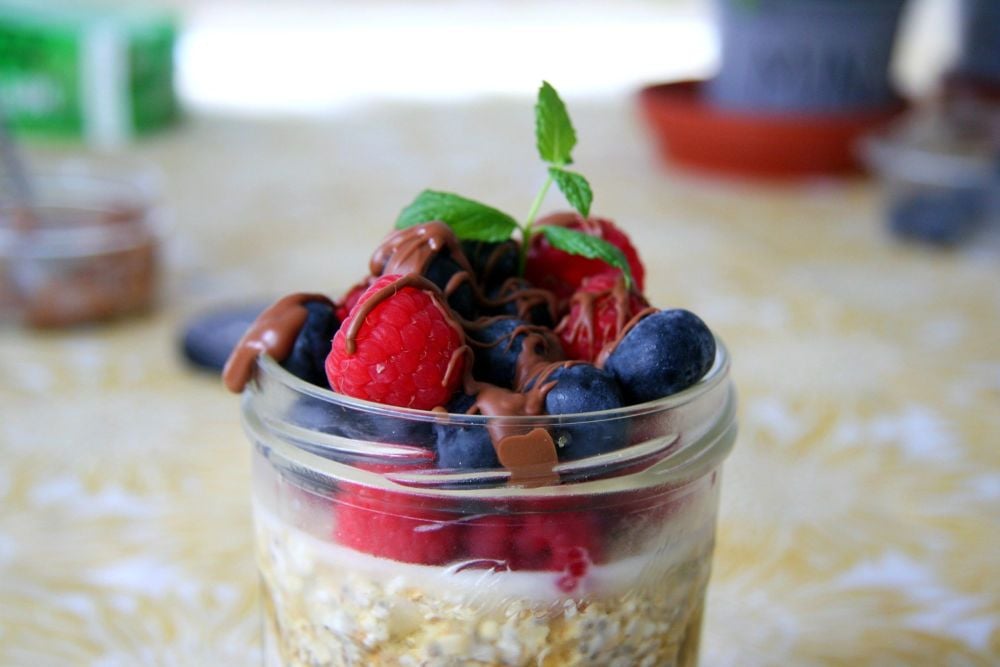
    overnight oats close up

    Overnight oats are honesty the perfect staple for anyone. You can prepare them in advance and then have them as quick on the go breakfast, or a snack to get you through the day. You can top them with anything you want from granola to chocolate, but here are some of my favourites:

    • Sliced banana

    • Fresh berries

    • Frozen berries

    • Dried fruits

    • Granola

    • Nut butter

    • Maple syrup

    • Chocolate 

    • Trail mix

    • Jam

    • Biscoff spread

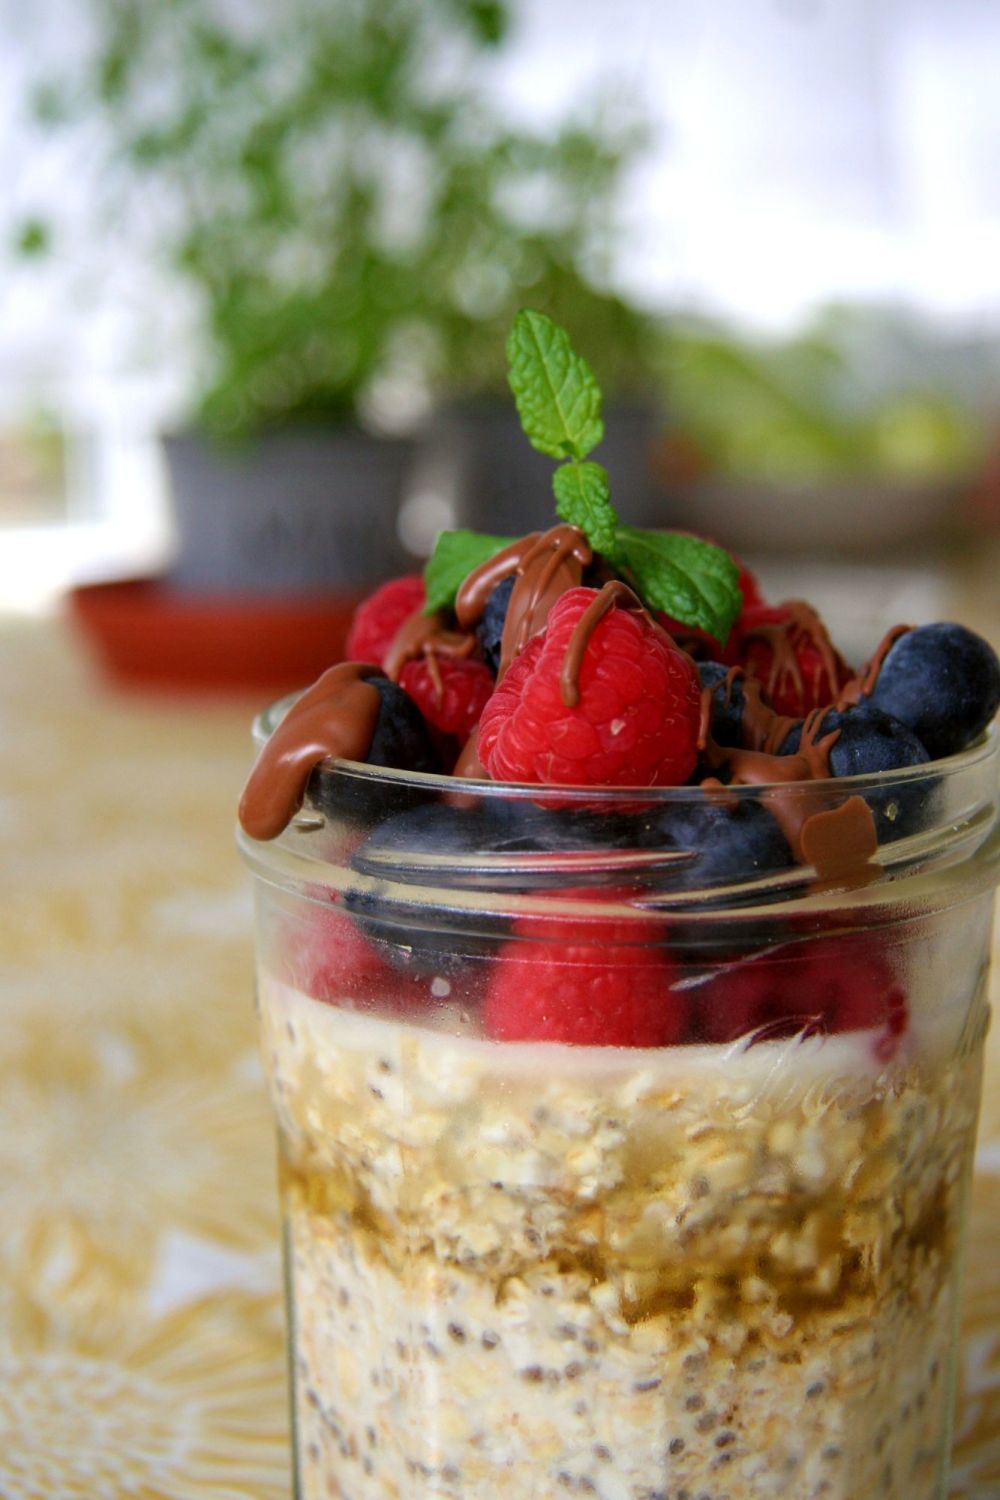
    overnight oats berries close up

    One problem I have with a lot of the overnight oats you see on the internet is the number of unhealthy toppings. Of course, you’re welcome to put whatever you want, and sometimes it can make a really special treat. 

    Generally, I like to limit the amount of added processed sugars I put with mine, the oats provide a great source of slow-release energy & the berries are a fantastic source of vitamins and antioxidants.

    My overnight oat recipe also contains chia seeds, these are a brilliant superfood which - as well as providing a thicker result in texture - also come with a huge amount of health benefits! You can read all about chia seeds in my blog post here! If you haven’t got any chia seeds, don’t worry. You can substitiure flax seeds in their place, or you can just leave them out entirely, however you may have a slight change in texture of the mix.

    If you get to your oats after they’ve had time to soften and think you’d prefer them a bit runnier, you can stir in a bit more milk just before you eat them!

    Another little addition that can really spice things up (pun completely intended) is the spice you choose to put in! I absolutely love cinnamon so thats generally my go-to, but around christmas time i like to put in a bit of ground ginger or nutmeg instead to change things up and give me a little festive kick.

    Now, whilst these are traditionally called overnight oats, you actually only need to leave them for about 2-3 hours before they’re ready to eat, so if you do forget they can be available at fairly short notice too. On the other side, they will last for up to 5 days in the fridge, so you can meal prep your working week of breakfasts all in one go! If you’re meal prepping, I would only prepare your oaty mixture and leave your additional toppings to go on fresh just before eating. 

    I hope you enjoy this recipe, please let me know in the comment below which variations and toppings you tried! You can also tag us in your instagram posts for a chance to be featured on our page! 
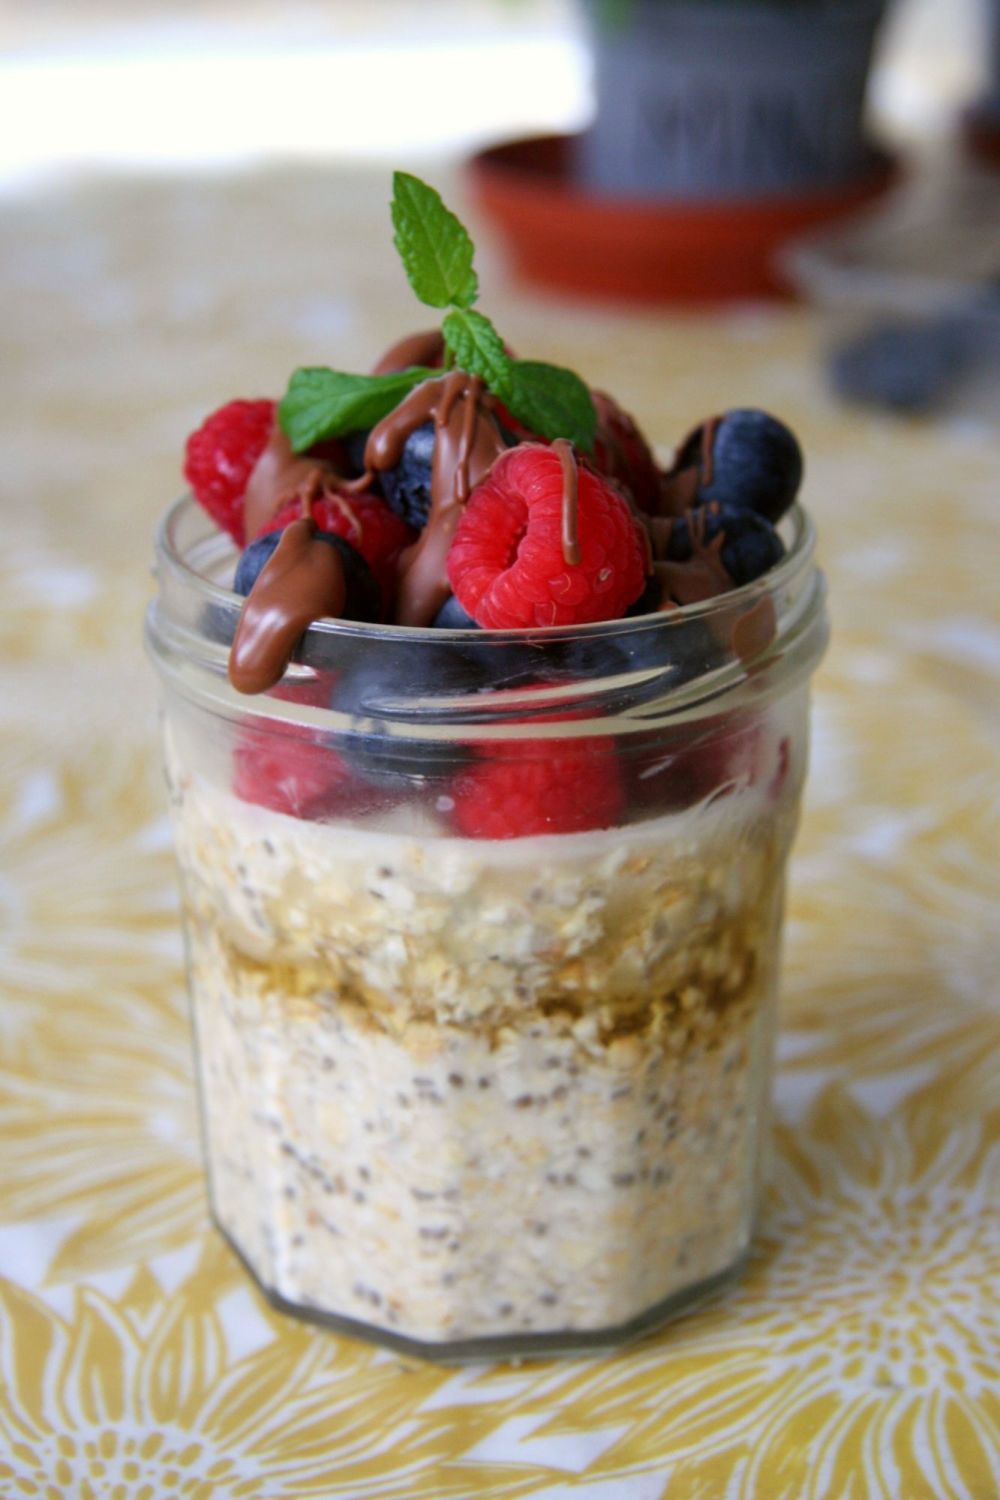
     whole photo overnight oats


    Recipe

    Yield: 2

    Prep Time: 5 minutes

    Setting Time: 2 hours

    Total Time: 2 hours 5 minutes

    Ingredients:

    For the rolled oats:

    • ¾ cup rolled oats

    • ¾ cup non-dairy milk (I like to use oat or coconut)

    • 1 tsp vanilla extract

    • 1 tsp ground cinnamon or ground ginger

    • 2 tsp chia seeds

    To top:

    • Fresh berries

    • 10g chocolate, melted

    • Mint to garnish (optional)


    Method:

    1. Add your oats, non-dairy milk, vanilla extract, spice and chia seeds to a mason jar.

    2. Mix well, pop the lid on and pop in the fridge for a minimum of 2-3 hours.

    3. Remove from the fridge, top with your favourite toppings and enjoy!


    What did you think of this recipe? Did you do anything differently? We’d love to hear from you in the comments below. Don’t forget that you can share all your foodie makes with us using the hashtag #HBivore.


    Follow us on Facebook and like us on Instagram to keep up to date with our latest recipes, news and content. You can also use the form below to receive all our news and free recipes straight to your inbox!

    Written by Amy Northwood
    Her-Bivore
    My passion for food and conservation has led me to where I am now! My aim is to show people that veganism can be diverse, tasty and adapted to fit every lifestyle and budget!
    You can find me on Instagram

    Amy Northwood - Her-Bivore


  2. 2 Ingredient Vegan Naan - no yeast!

    Posted on

    2 Ingredient Vegan Naan - no yeast!

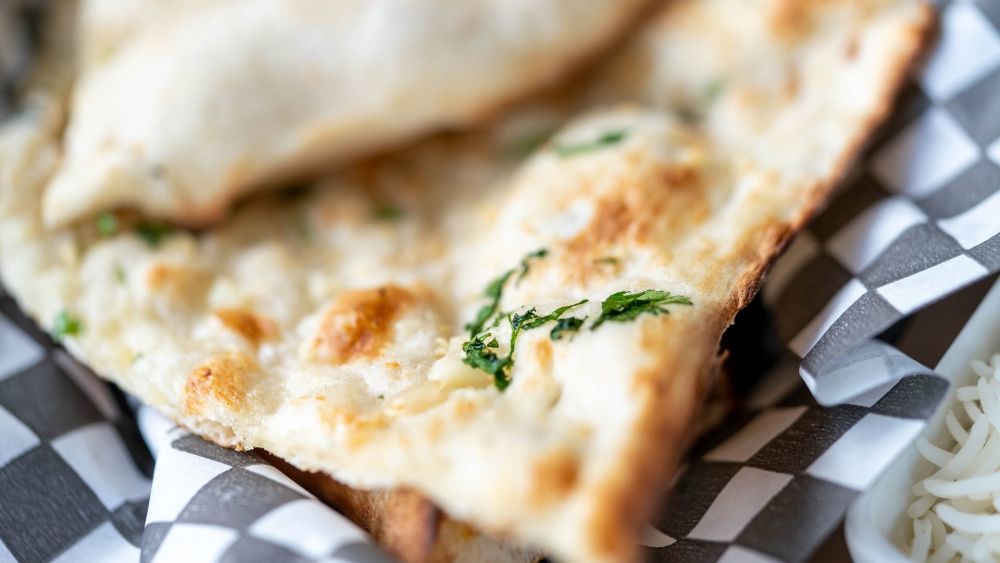
    bread-5471408_1920

    This recipe is so quick and easy and is made from only two ingredients you’ve probably got in your kitchen right now!

    Naan are a soft, chewy delicious bread originally created over 2,500 years ago in India and it is traditionally baked in a tandoor, or cylindrical clay oven. Now I’m probably not the only one who hasn't for a tandoor hanging around in their kitchen, but worry not as we can create a delicious vegan naan with little more than some enthusiasm and a frying pan!

    Despite the immense climb of vegan food in supermarket chains in recent years, one thing I still find it difficult to source is vegan naans! The only one I'm able to find is a ‘free from’ in tescos that I find to be bitty and of a strange texture. The main reason many naan’s aren;t suitable for vegans is because they contain yoghurt, so it seems pretty easy that we can just swap that out for a vegan yoghurt and be half way there to fresh, warm, homemade vegan naan breads.

    If you’re in a rush, your two ingredients naan’s will go down a treat, but if you’ve got a little more time and a few more ingredients you can create something really special. Brushing your naan’s with a vegan margarine or olive oil once cooked, and topping with some fresh herbs and garlic will create a truly irresistible accompaniment for any indian dish. For a real infusion of flavour you can add some garlic, seasalt or herbs to your mix when combining too.

    Some ideas of additional ingredients that would go great include:

    • Coriander

    • Dried herbs

    • Fresh or dried garlic

    • Olive oil

    • Vegan margarine

    • Additional vegan yoghurt to top

    • Sea salt


    If you’re after a great vegan dish to have these with, check out some of these:


    Make sure you let us know in the comments below how yours turned out and if you did anything differently. Also remember to tag us in your foodie makes on instagram!


    Recipe

    Yield: 2 portions

    Total Time: 35 minutes

    Ingredients:

    • 200g / 1.25 cups self raising flour

    • 200g / 0.8 cups vegan yoghurt

    • Optional: coriander, garlic, dried herbs or oil to top


    Method:


    1. Weigh out you flour in a bowl, then add in your yoghurt. Mix together with a spatula until it comes together then tip out onto a floured surface. If your mix is a little too sticky, now’s the time to add some more flour.

    2. Divide your mix into 4 equal sections using a knife, taking one at a time, roll them out into an oval shape about half a centimeter thick.

    3. Heat up a dry pan on a medium heat, then cook each naan for a couple of minutes on each side until they’re nicely browned

    4. Serve with your favourite dish or enjoy as a delicious snack!


    Written by Amy Northwood
    Her-Bivore
    My passion for food and conservation has led me to where I am now! My aim is to show people that veganism can be diverse, tasty and adapted to fit every lifestyle and budget!
    You can find me on Instagram
    Amy Northwood - Her-Bivore

    What did you think of this recipe? Did you do anything differently? We’d love to hear from you in the comments below. Don’t forget that you can share all your foodie makes with us using the hashtag #HBivore.

    Follow us on Facebook and like us on Instagram to keep up to date with our latest recipes, news and content. You can also use the form below to receive all our news straight to your inbox each week. 

  3. Banana Oat Cookies

    Posted on

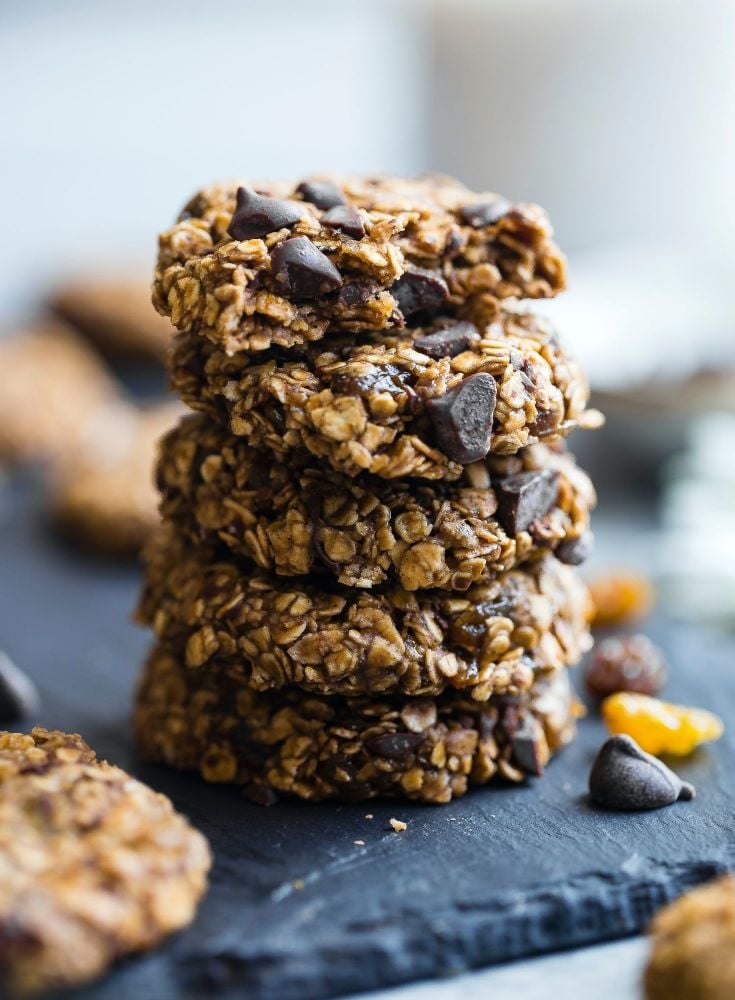
    banana oat cookies

    Banana Oat Cookies

    Jump to Recipe>>

    If there's one thing to learn about me in this blog, it’s that i'm great at buying bananas, but terrible at actually eating them.

    I always buy them with the good intention of having them with breakfast or making them into smoothies, but by the time I remember they’re there breakfast is long gone and I realise I have absolutely nothing else to put into a smoothie.

    I watch them sit on the kitchen side, patiently waiting, first they get little brown spots, and then one day you wake up and BAM, they’re more brown than yellow. Someone once told me that the healthiest time to eat a banana is when they’re brown, but i don't know how much truth there is to that.

    Regardless, I suppose if you’re putting them into banana bread or baking them into these delicious oat cookies then the health benefits are a little bit to be desired.

    That said, these aren’t the worst snack for you, and the oats provide a great slow release energy making them ideal for a breakfast or morning snack (and certainly one I won't have trouble remembering to eat!).

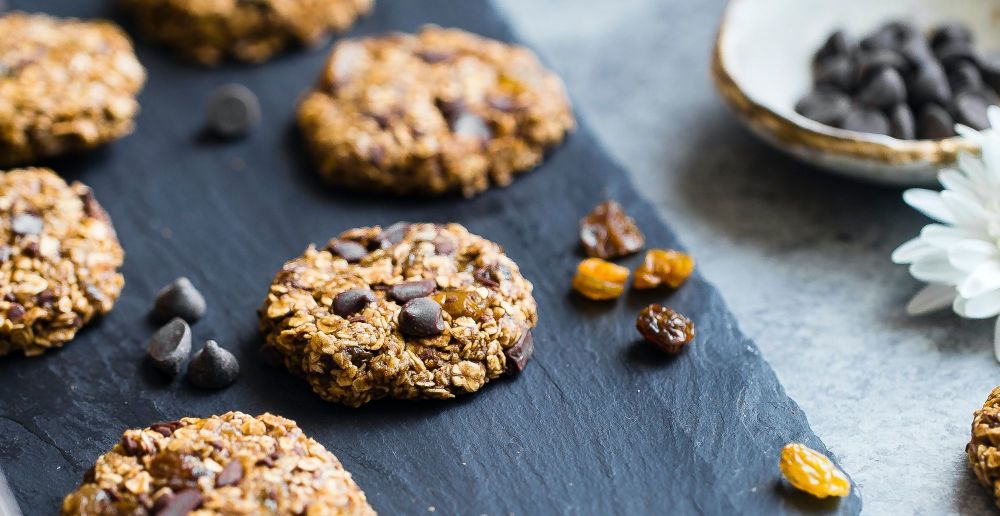
    What i love about this recipe is that you can change out the chocolate chips for something else if you’d prefer. They work great with raisins, cranberries, nuts, or even no added extra at all!

    As a tip, if you want the same gorgeous result as the picture, save a few of your chocolate chips for after they’ve come out the oven, and then simply sprinkle them over the top! 

    You can also make these a bit bigger if you prefer a bigger cookie (and who doesn’t?) but i tried to keep them as a nice lower calorie snack for when i'm feeling peckish. If you do make them bigger, remember they might need a little longer in the oven, but please be careful not to over bake, otherwise you’ll lose that soft chewy center.

    During the recipe, you’ll also notice that you leave the mix to sit for 15 minutes before adding your chocolate chips and shaping your cookies, this gives the oats a chance to absorb the moisture from the other ingredients, and means they’re nice and soft when they cook, improving the overall end result.

    If you live in a hot climate, your coconut oil will be ready to use from the cupboard. Here in the UK, the climate is too cold for coconut oil to be a liquid or soft enough to use straight from the cupboard, so if yours is too firm you’ll need to spoon out what you need and soften it in a small bowl in the microwave first.

    banana oat cookies top


    Recipe

    Yield: 8

    Total Time: 40 minutes

    Ingredients:

    • 1 medium banana

    • 1 cup / 100g rolled oats

    • 2 tbsp maple syrup or agave 

    • 1 tbsp coconut oil (melted)

    • Pinch of salt

    Method:

    1. Preheat your oven to 170c and line a baking tray with parchment.

    2. Mash your banana in a bowl with a fork, then mix in your syrup, oil and oats. Leave this mix to rest for 15 minutes to let the oats soak up some moisture.

    3. Gently fold in your chocolate chips and salt, then using 1 tbsp of mix, roll it into a ball in your hands and then gently flatten. 

    4. Place onto the baking tray and bake for 15 minutes

    5. Remove from the oven and sprinkle with a few more chocolate chips if you want the aesthetic effect, otherwise they’re fine just as they are!


    These cookies will store for 2-3 days in an airtight container, then they’ll start to change texture a little, but they’ll still be safe to eat!

    What did you think of this recipe? Did you do anything differently? We’d love to hear from you in the comments below. Don’t forget that you can share all your foodie makes with us using the hashtag #HBivore.

    Follow us on Facebook and like us on Instagram to keep up to date with our latest recipes, news and content. You can also use the form below to receive all our news straight to your inbox each week. 

    Written by Amy Northwood
    Her-Bivore
    My passion for food and conservation has led me to where I am now! My aim is to show people that veganism can be diverse, tasty and adapted to fit every lifestyle and budget!
    You can find me on Instagram
    Amy Northwood - Her-Bivore


  4. Vegan Jammy Dodgers

    Posted on

    Jammy Dodgers

    Vegan Jamie Dodgers

    Jump to Recipe>>

    I was walking through the supermarket the other day, working my way through the isles I needed, skipping the biscuit aisle completely as to try to avoid those sugary temptations, when something caught my eye on the end of an isle. 

    The ‘specials’ section, with all the offers and discounted products dragged me in, and of course, staring back at me was a packet of jammie dodgers. All it took was that brief second for me to know that i just HAD to make some vegan jammie dodgers.

    Jammy Dodgers actually used to be accidentally vegan, until some point in 2016 where the clearly confused company decided to add whey (milk protein) to their recipe in a bid to improve dwindling sales.

    The theory is pretty basic, just a simple crumbly biscuit recipe with some rich jam sandwiched in the middle. You want to make sure you use a seedless jam otherwise your biscuits won’t sit right. Also make sure you give your jam a good stir so you don’t have any big lumps, you want a smooth sweet center to your delicious treats.

    Of course, you’ll need biscuit cutters. The traditional design uses a round cutter for the biscuit shape, and then a smaller, heart shaped cutter for the centre of half the biscuits, so when they sandwich together you get that irresistible cute little jammy heart. 

    If you haven't got those shapes, don’t worry too much! As long as you have one bigger cutter for the biscuit shape itself and then a smaller cutter for the inside, they’ll work perfectly fine. Remember though, the bigger biscuit size you choose, the less it’ll make in total and the longer they’ll need in the oven, and vice versa.

    These exciting little biscuits are great for having around the house as a daily treat (or 5-daily treat in my case) but also make a fabulous kid-friendly recipe to keep you and your little ones busy on a rainy day.

    If you’re truly a biscuit connoisseur, you may be wondering how this recipe creates decadent jammy dodgers when we all know the jam is much ticker in store bought jammie dodgers. Nothing gets past your keen biscuit senses, eh?

    If you’re desperately after that thick jammy texture, you’ll need to pop your jam into a pan first and gently reduce it down to the desired consistency.

    You also don’t have to use raspberry jam. The beauty of homemade is the somewhat limitless realms of customisation. You can use any type of seedless jam you have, or that you think would be delicious. There's also nothing stopping you making a batch where they each have different jams, a ‘homemade variety batch’ of jammy dodgers if you will.

    Be sure to tell us in the comments below which cutter shapes you used, bonus points for sharing a photo on instagram and tagging us! (we might even feature you on ours!)


    Recipe

    Yield: 12 biscuits 

    Total Time: 20 minutes

    Ingredients:

    • ½ cup / 120g vegan margarine

    • ½ cup / 110g caster sugar

    • 1 ½ cups / 180g plain flour

    • Seedless raspberry jam

    Method:

    1. In a mixing bowl or with a whisk, cream together your margarine and sugar until combined. 

    2. Slowly add your flour bit by bit until you’ve added it all and the mix comes together to form a ball. If your mix is still crumbly, just keep mixing and wait, it’ll come together in it’s own time.

    3. Remove the mix from the bowl and form into one ball, then place into the fridge for about 30 minutes (this helps the biscuits keep their shape as they bake).

    4. Preheat your oven to 180c and line a large tray with baking parchment.

    5. Roll out your mix on a lightly floured surface to about 1/2cm, thickness, then use your cutter to make as many biscuits as you can, re rolling and cutting as required until all your mix is used up. Use your smaller cutter to cut the smaller centre holes in half your biscuits.

    6. Bake for 10-15 minutes, but watch closely! You want the biscuits to be just starting to go golden brown around the edges. 

    7. Remove from the oven, and once cooled slightly, transfer to a collign rack until completely cold.

    8. Once cool, spoon about ½ teaspoon of jam into the centre of your whole biscuits, and then gently top with a centre shaped biscuit. 


    What did you think of this recipe? Did you do anything differently? We’d love to hear from you in the comments below. Don’t forget that you can share all your foodie makes with us using the hashtag #HBivore.


    Follow us on Facebook and like us on Instagram to keep up to date with our latest recipes, news and content. You can also use the form below to receive all our news straight to your inbox each week.

    Written by Amy Northwood
    Her-Bivore
    My passion for food and conservation has led me to where I am now! My aim is to show people that veganism can be diverse, tasty and adapted to fit every lifestyle and budget!
    You can find me on Instagram
    Amy Northwood - Her-Bivore

    Stay up to date with all our latest articles
    • This site is protected by reCAPTCHA and the Google Privacy Policy and Terms of Service apply.

  5. Chocolate Chunk Shortbread

    Posted on

    chocolate chunk shortbread

    Chocolate Chunk Shortbread

    Don’t be fooled into thinking this shortbread recipe isn’t anything special just because it doesn’t contain any fancy ingredients or complex steps. One omni family member said it's the best shortbread she’s ever had, and she’s requested some for her birthday! 

    Don’t take her word for it though, this chocolate chunk shortbread is so quick and easy to make, and you probably have everything you need for it in your house right now, so there really is no excuse. 

    I’ve made it with dark chocolate, and I also tried it with bournville orange chocolate which was absolutely amazing, but you can use any type of vegan chocolate you can get your hands on. 


    Recipe

    Yield: 16 shortbread

    Total Time: 1H 40M (includes 1 hour fridge time) 

    Ingredients:

    • 250g vegan margarine

    • 150g golden caster sugar (you can use white if you prefer)

    • 1tsp vanilla extract

    • 375g plain flour

    • 170g vegan chocolate, chopped into chunks


    Method:


    1. Cream together your margarine and sugar, and then add your vanilla. 

    2. Using a spoon or spatula mix in your plain flour until a dough is formed, then mix in your chocolate chunks. Form your mix into one ball, wrap and refrigerate for 1 hour.

    3. On a floured surface, roll out your dough half at a time to about 3cm thick, then use a knife to cut out your shortbread, you want to get 8 out of each half. Keep rolling and cutting until you’ve used all your mix. Place your shortbread into a lined tray and pop back in the fridge for 10 minutes. Preheat your oven to 170c.

    4. Bake for about 15 minutes, you want them to just be going golden round the edges. 

    5. Leave to cool for a few minutes and then transfer to a cooling rack.


    What did you think of this recipe? Did you do anything differently? We’d love to hear from you in the comments below. Don’t forget that you can share all your foodie makes with us using the hashtag #HBivore.


    Follow us on Facebook and like us on Instagram to keep up to date with our latest recipes, news and content. You can also use the form below to receive all our news straight to your inbox each week. 

    Written by Amy Northwood
    Her-Bivore
    My passion for food and conservation has led me to where I am now! My aim is to show people that veganism can be diverse, tasty and adapted to fit every lifestyle and budget!
    You can find me on Instagram

    Amy Northwood - Her-Bivore

    Get Notified When We Launch...
    • This site is protected by reCAPTCHA and the Google Privacy Policy and Terms of Service apply.