Her-Bivore Blog

 RSS Feed

Category: Mains

  1. Mac 'n' Cheese - No Cashews!

    Posted on
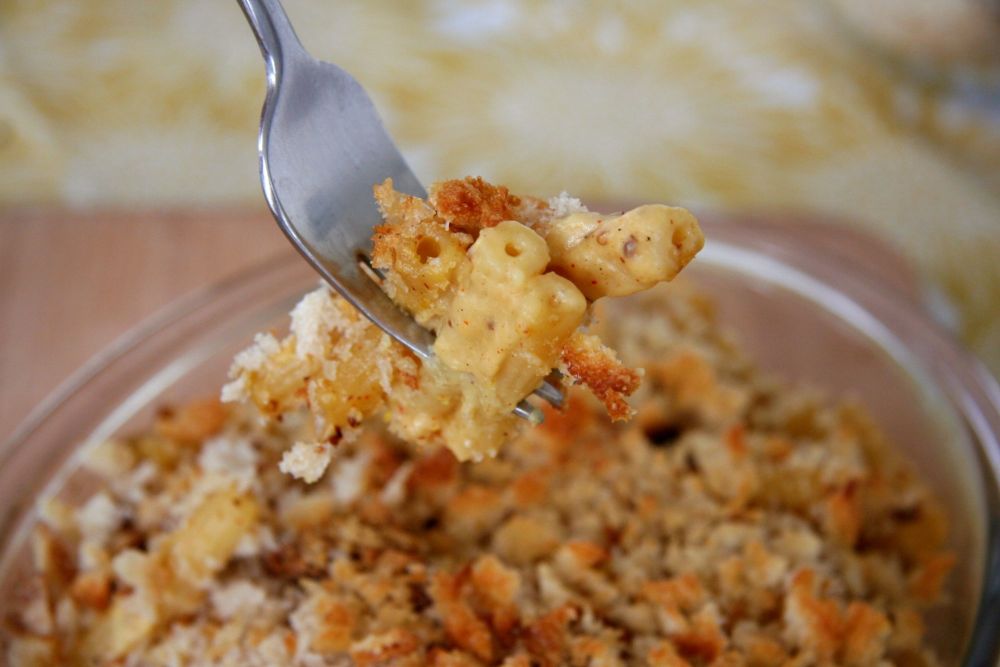
    mac n cheese close up on fork

    Mac 'n' Cheese - No Cashews!

    Mac ‘n’ cheese, the long-standing comfort food across nations. Comparable to a blanket, open fire & a Harry Potter marathon - or maybe that’s just me. Regardless, mac ‘n’ cheese is one of the most popular dishes that spring to mind when you think of foods that taste like home. 

    There are a few things a mac ‘n’ cheese needs to be in order to fit my home comfort criteria:

    • Creamy

    • Rich

    • Cheesy

    • Gooey

    • Filling (for both body & soul)


    This mac ‘n’ cheese ticks all the boxes. 

    Traditionally you’ll want to use macaroni pasta (also known as elbow pasta), but for some reason every time I got to make a mac ‘n’ cheese recipe, I never have any in the cupboards, so like with all things in the kitchen, a little improvisation was in order. 

    The bread crumbs are a nice addition I originally saw on Pinterest, vegan cheese isnt known for its beauty and ability to melt freely on the top of a dish, so breadcrumbs make a nice change and I find a bit more aesthetically pleasing. 

     I had a sourdough around that was a few days old and it made the absolute perfect breadcrumb addition to the mac ‘n’ cheese, adding a subtle crunch to go with the thick, gooey cheesy sauce. You can use any bread you have around, but if it’s fresh, I advise gently toasting under a grill for a few minutes on each side so you really get that bread crumb crunch.

    What cheese you use is completely up to you, I used the Violife grated, but any grated vegan cheese will do, some melt at slightly higher temperatures or take a little longer to melt than others so don’t be disheartened if yours takes a little while, a bit of perseverance and a whisk and you’ll have a smooth creamy sauce in no time. 

    As with all mac ‘n’ cheese, one of the highlights is just how quick and easy it is to make, and this recipe is no different, as a basic rundown:

    • Cook & drain your pasta.

    • Whisk together the bits for your cheese sauce, allowing it to come to the boil and thicken.

    • Stir your pasta into your cheese sauce & pop it into an oven proof dish.

    • Top with breadcrumbs, drizzle with a little melted butter & bake for 15-20 minutes.

    If you want some added vegetables, stirring in some cooked broccoli and peas makes a fantastic addition. You can also top with more grated cheese if you like, but I find the breadcrumbs on top add enough. 

    The full in-depth recipe is below, and I have no doubt you’ll love this recipe as much as I do, but if you try anything different, let me know in the comments below!
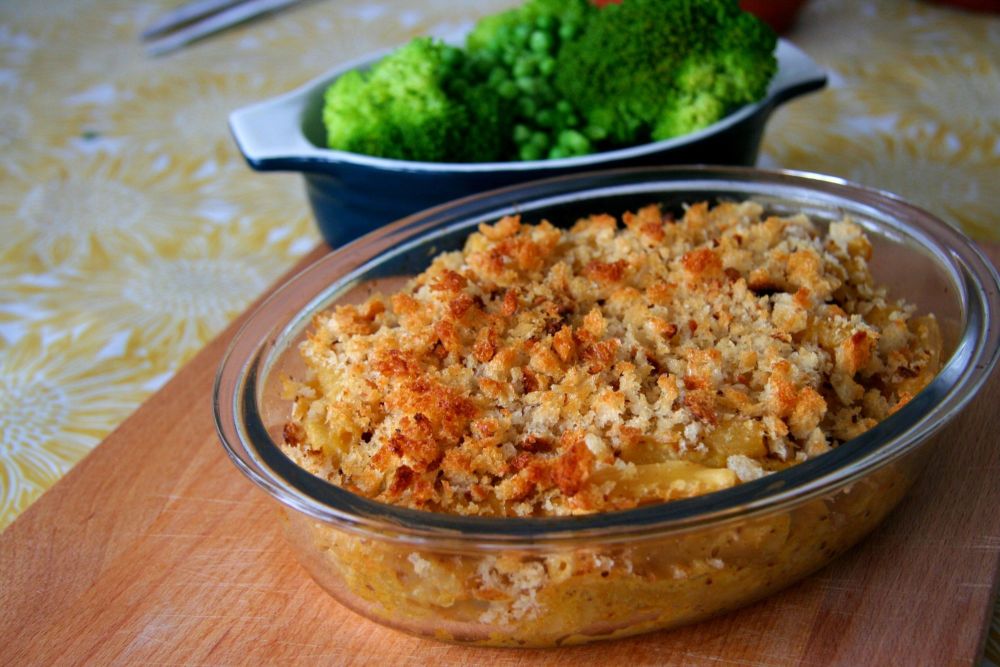
     

     Cashew mac n cheese with vegetables in background


    Recipe

    Yield: 4 portions 

    Total Time: 1 hour 20 minutes 

    Ingredients:

    For the Cheese Sauce:

    • 2 tbsp margarine

    • 4 tbsp plain flour

    • 2 cups / 500ml non-dairy milk (I used soya)

    • ½ cup / 30g nutritional yeast

    • 80g grated vegan cheese

    • 1 tsp onion powder

    • 1 tsp paprika

    • 1 tsp garlic powder

    • 1 tsp wholegrain mustard

    For the Pasta:

    • 250g dried macaroni pasta

    For the Breadcrumbs:

    • 2 slices thick-cut sourdough

    • 1 tbsp vegan margarine, melted


    Method:


    1. Cook your pasta as per instructions on the packet, drain and set to one side. At this time, preheat your oven to 200c.

    2. In the meantime, place your margarine in a pan on a medium heat, once melted add your plain flour and whisk until it all comes together.

    3. Pour in your non-dairy milk and whisk until all the lumps are removed.

    4. Add your nutritional yeast, grated cheese, onion powder, paprika, garlic powder and wholegrain mustard and whisk until combined. You may need to give your cheese a while to come up to temperature and melt. Make sure to keep whisking regularly to avoid your sauce catching on the bottom of your pan, as it comes to the boil it will thicken. 

    5. Once thickened and combined, remove from the heat, fold in your pasta and transfer to a large ovenproof dish.

    6. Tear up your sourdough and using a food processor, process until it becomes coarse breadcrumbs. Sprinkle a thick layer of breadcrumbs over your dish of mac ‘n’ cheese and then drizzle over your melted margarine.

    7. Place in your preheated oven and bake for 15-20 minutes or until your breadcrumbs are golden brown.
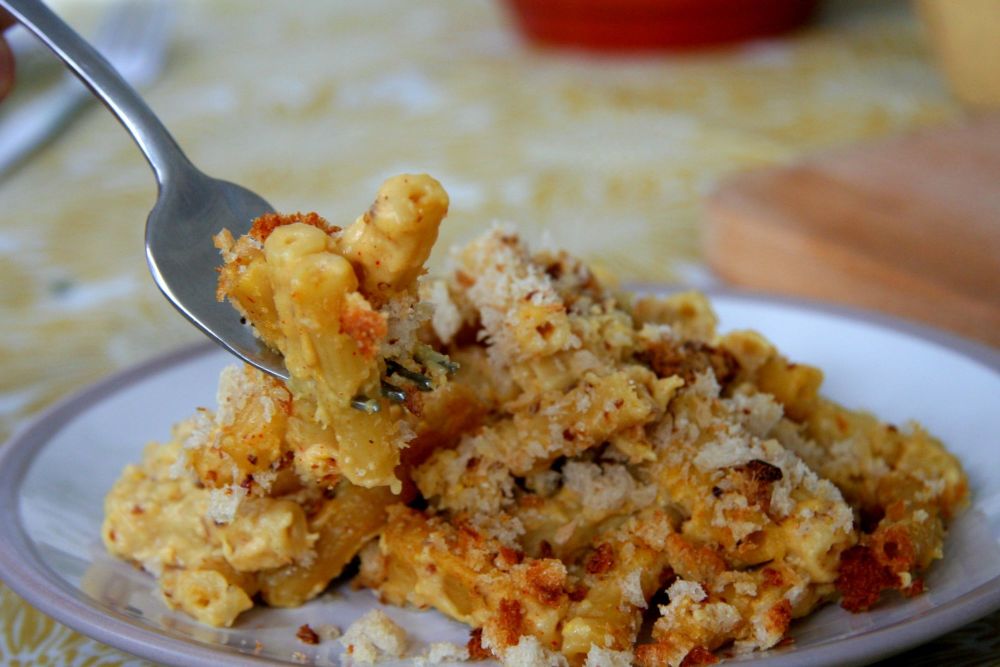


     mac n cheese on plate


    What did you think of this recipe? Did you do anything differently? We’d love to hear from you in the comments below. Don’t forget that you can share all your foodie makes with us using the hashtag #HBivore.


    Follow us on Facebook and like us on Instagram to keep up to date with our latest recipes, news and content. You can also use the form below to receive all our news and free recipes straight to your inbox!

    Written by Amy Northwood
    Her-Bivore
    My passion for food and conservation has led me to where I am now! My aim is to show people that veganism can be diverse, tasty and adapted to fit every lifestyle and budget!
    You can find me on Instagram

    Amy Northwood - Her-Bivore


    Get Notified When We Launch...
    • This site is protected by reCAPTCHA and the Google Privacy Policy and Terms of Service apply.


  2. 2 Ingredient Vegan Naan - no yeast!

    Posted on

    2 Ingredient Vegan Naan - no yeast!

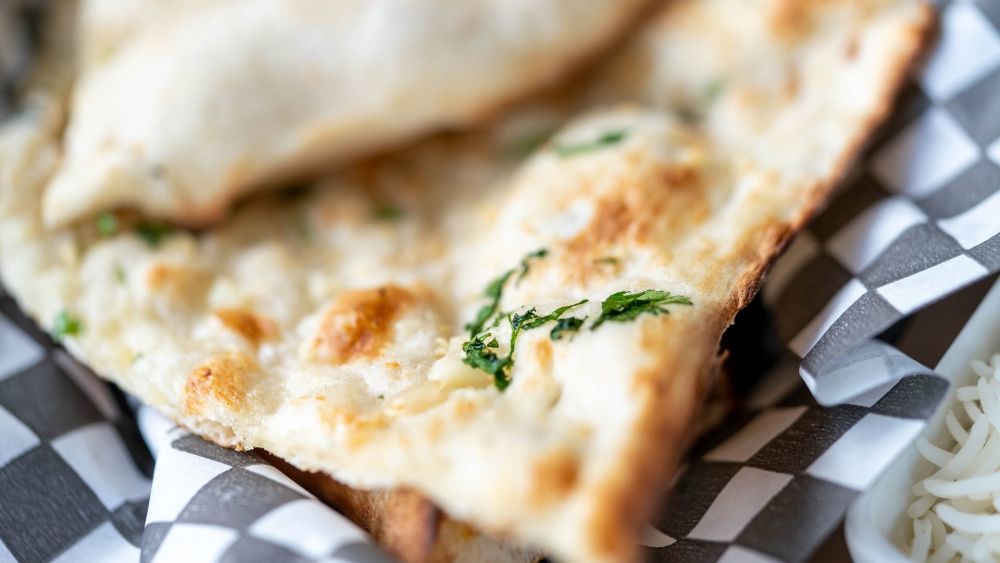
    bread-5471408_1920

    This recipe is so quick and easy and is made from only two ingredients you’ve probably got in your kitchen right now!

    Naan are a soft, chewy delicious bread originally created over 2,500 years ago in India and it is traditionally baked in a tandoor, or cylindrical clay oven. Now I’m probably not the only one who hasn't for a tandoor hanging around in their kitchen, but worry not as we can create a delicious vegan naan with little more than some enthusiasm and a frying pan!

    Despite the immense climb of vegan food in supermarket chains in recent years, one thing I still find it difficult to source is vegan naans! The only one I'm able to find is a ‘free from’ in tescos that I find to be bitty and of a strange texture. The main reason many naan’s aren;t suitable for vegans is because they contain yoghurt, so it seems pretty easy that we can just swap that out for a vegan yoghurt and be half way there to fresh, warm, homemade vegan naan breads.

    If you’re in a rush, your two ingredients naan’s will go down a treat, but if you’ve got a little more time and a few more ingredients you can create something really special. Brushing your naan’s with a vegan margarine or olive oil once cooked, and topping with some fresh herbs and garlic will create a truly irresistible accompaniment for any indian dish. For a real infusion of flavour you can add some garlic, seasalt or herbs to your mix when combining too.

    Some ideas of additional ingredients that would go great include:

    • Coriander

    • Dried herbs

    • Fresh or dried garlic

    • Olive oil

    • Vegan margarine

    • Additional vegan yoghurt to top

    • Sea salt


    If you’re after a great vegan dish to have these with, check out some of these:


    Make sure you let us know in the comments below how yours turned out and if you did anything differently. Also remember to tag us in your foodie makes on instagram!


    Recipe

    Yield: 2 portions

    Total Time: 35 minutes

    Ingredients:

    • 200g / 1.25 cups self raising flour

    • 200g / 0.8 cups vegan yoghurt

    • Optional: coriander, garlic, dried herbs or oil to top


    Method:


    1. Weigh out you flour in a bowl, then add in your yoghurt. Mix together with a spatula until it comes together then tip out onto a floured surface. If your mix is a little too sticky, now’s the time to add some more flour.

    2. Divide your mix into 4 equal sections using a knife, taking one at a time, roll them out into an oval shape about half a centimeter thick.

    3. Heat up a dry pan on a medium heat, then cook each naan for a couple of minutes on each side until they’re nicely browned

    4. Serve with your favourite dish or enjoy as a delicious snack!


    Written by Amy Northwood
    Her-Bivore
    My passion for food and conservation has led me to where I am now! My aim is to show people that veganism can be diverse, tasty and adapted to fit every lifestyle and budget!
    You can find me on Instagram
    Amy Northwood - Her-Bivore

    What did you think of this recipe? Did you do anything differently? We’d love to hear from you in the comments below. Don’t forget that you can share all your foodie makes with us using the hashtag #HBivore.

    Follow us on Facebook and like us on Instagram to keep up to date with our latest recipes, news and content. You can also use the form below to receive all our news straight to your inbox each week. 

  3. Pea & Lime Risotto

    Posted on

    Lime and Pea Risotto

    Lime & Pea Risotto

    This recipe is so budget friendly you won’t even notice the ingredients have gone from your pantry!

    It’s quick and easy and also a nice balanced meal. Feel free to add in some other cooked veggies if your heart desires, but I thought I’d leave this nice and basic so it’s accessible for everyone. 

    Some ideas of other veggies that would go great include:

    • Babycorn

    • Asparagus

    • Sweetcorn

    • Tenderstem Broccoli

    • Mushrooms

    • Artichoke


    This recipe calls for veg stock, which can be made simply by mixing a stock cube with boiling water. Read the stock cube packet so you know how many you need to use for 600ml of water.

    I based this recipe on two people, as that's generally the amount I’m cooking for. If you’re on your own you can always make two portions and then pop one in the fridge once cooled for an even easier meal the next day!

    If you wanted to spice this up a bit, some fresh tarragon or oregano stirred through will add an extra depth of flavour, but I find the freshness of the lime is fine as it is so certainly don’t feel like you’re missing out!

    Make sure you let us know in the comments below how yours turned out and if you did anything differently. Also remember to tag us in your foodie makes on instagram!


    Recipe

    Yield: 2 portions

    Total Time: 35 minutes

    Ingredients:

    • 2 tbsp vegan margarine

    • ½  white onion, finely diced

    • 1 garlic clove, crushed

    • 140g risotto rice

    • 2 ½ cups / 600ml vegetable stock

    • ½ cup / 75g frozen peas 

    • Juice of half a lime


    Method:


    1. Melt your margarine in a pan and gently fry off your onion and garlic for a few minutes until soft. Add in your risotto rice. 

    2. Add your stock one ladle at a time, allowing the previous ladles worth to be absorbed before adding the next. Continue this until it’s all used up, stirring occasionally.

    3. Stir in your peas and lime juice, allow to cook for 2-3 minutes until the peas are cooked.

    4. Serve topped with a lime wedge!


    What did you think of this recipe? Did you do anything differently? We’d love to hear from you in the comments below. Don’t forget that you can share all your foodie makes with us using the hashtag #HBivore.

    Follow us on Facebook and like us on Instagram to keep up to date with our latest recipes, news and content. You can also use the form below to receive all our news straight to your inbox each week. 


    Written by Amy Northwood
    Her-Bivore
    My passion for food and conservation has led me to where I am now! My aim is to show people that veganism can be diverse, tasty and adapted to fit every lifestyle and budget!
    You can find me on Instagram
    Amy Northwood - Her-Bivore

    Get Notified When We Launch...
    • This site is protected by reCAPTCHA and the Google Privacy Policy and Terms of Service apply.

  4. Tofu Peanut Curry

    Posted on

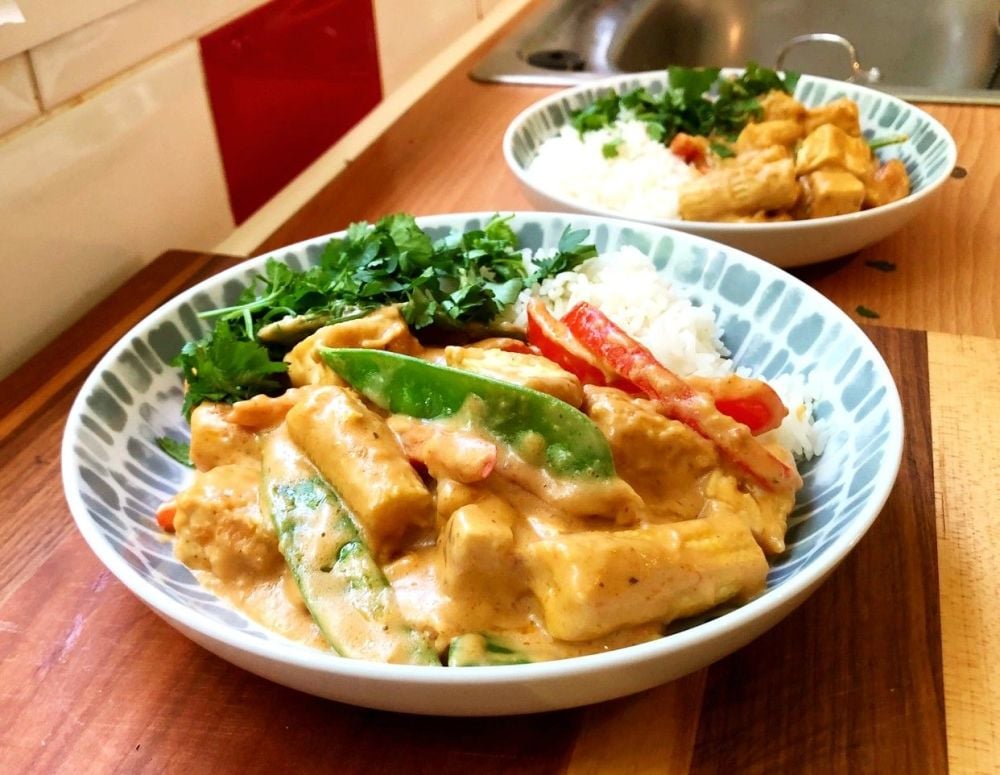
    Tofu Peanut Curry

    Tofu Peanut Curry

    Another curry recipe! I don’t think I’ll ever get bored of how many options curry has. I don’t know when or where I’ve eaten peanut curry before, but somehow i just started insanely craving it the other day.

    I wanted this to be everything I had imagined so I knew it had to be perfect. Tofu and veggies seemed like the perfect way to when deciding on a pairing for this. Tossing the tofu means you can get it really nice and crispy in the pan, so this is something I would always recommend when you’re frying off tofu.

    I chose mange tout and baby corn as I wanted this curry to be colourful and have a nice crunch to it too. If you wanted to swap them out for some other veggies that's fine too, I think tenderstem broccoli or asparagus would go brilliantly too!

    Make sure you let us know in the comments below how yours turned out and if you did anything differently. Also remember to tag us in your foodie makes on instagram!


    Recipe

    Yield: 3-4 portions

    Total Time: 45 minutes

    Ingredients:

    • 1 block tofu (400g)

    • 2 tbsp corn flour

    • 2 tbsp olive oil

    • 1 400g tin coconut milk

    • 4 tbsp peanut butter

    • 1 tbsp red curry paste

    • 1 tbsp fresh ginger, peeled & grated

    • 1 tbsp soy sauce

    • 1 red pepper, sliced

    • 70g baby corn

    • 70g mange tout or super snap peas


    To serve:

    • 90g uncooked rice per person

    • fresh coriander


    Method:


    1. Press your tofu by draining all the liquid, wrapping in a clean kitchen cloth and placing a plate and a couple of heavy tins on top to squeeze the moisture out. Leave for about 15 minutes. 

    2. Cut your tofu into cubes and place into a large bowl. Add your cornflour and toss until evenly covered. Heat up your oil in a large skillet and fry off your tofu until browned and crispy on all sides.

    3. At this point if you’re serving your curry with rice you’ll want to start cooking it! 

    4. Add in your coconut milk, peanut butter, curry paste, ginger, soy sauce, and lime juice. Heat on a medium heat until all your ingredients come together to make a delicious sauce.

    5. Add in your sliced pepper, baby corn and mange tout and allow to gently simmer until your veggies are cooked.

    6. Serve with a slice of lime and a sprinkling of fresh coriander if you wish!


    What did you think of this recipe? Did you do anything differently? We’d love to hear from you in the comments below. Don’t forget that you can share all your foodie makes with us using the hashtag #HBivore.


    Follow us on Facebook and like us on Instagram to keep up to date with our latest recipes, news and content. You can also use the form below to receive all our news straight to your inbox each week. 

    Written by Amy Northwood
    Her-Bivore
    My passion for food and conservation has led me to where I am now! My aim is to show people that veganism can be diverse, tasty and adapted to fit every lifestyle and budget!
    You can find me on Instagram

    Amy Northwood - Her-Bivore

    Get Notified When We Launch...
    • This site is protected by reCAPTCHA and the Google Privacy Policy and Terms of Service apply.

  5. Courgette Fritters

    Posted on

    Courgette Fritters

    Courgette Fritters

    The other day I was having such a mental vegan food block, not even just for writing, all of a sudden I couldn’t remember what vegans eat!

    After 3 years vegan I’d started to get into that rut of just eating the same things over and over again, a problem I had before vegan and something I still struggle with now. Food is exciting, it's adventurous, and sometimes I just need a kick up the back side to remember that.

    I was scrolling pinterest endlessly looking for some inspiration when I came across corn fritters, something we used to serve at the restaurant I used to work at and that I hadn't eaten in years. Knowing I had some courgettes in the fridge that we’re being abandoned and forgotten about, I thought courgette fritters would be a good way to go!

    Courgettes are quite a wet vegetable, which can make them difficult to use in a recipe like this as they can just make the fritters fall apart because they’re too wet. Thanks to a tip I learned from Antoni (one of the fab 5 from Queer Eye), all you need to do is sprinkle lightly with salt, give it a mix and wait for the salt to draw the moisture out of the courgette. This also works great for aubergine when you want to get it really crispy when frying.

    I generally just serve these on their own with a big dollop of vegan mayo or vegan sour cream, but they would go great with a salad or couscous.

    I made mine using a large frying pan so I only had to do two lots, but if you’re using a smaller pan or you’re worried about your fritters getting cold you can pop your oven on about 100c and place them on a tray in the oven when cooked to keep them hot until you’re ready to serve.

    Make sure you let us know in the comments below how yours turned out and if you did anything differently. Also remember to tag us in your foodie makes on instagram!


     Courgette Fritters on plate


    Recipe

    Yield: 10 fritters

    Total Time: 30 minutes

    Ingredients:

    • 3 ½ cups / 500g courgettes

    • 2 tsp salt

    • ½ cup / 30g nutritional yeast

    • 1 cup / 125g plain flour

    • 1tsp baking powder

    • ½ tsp garlic granules

    • 2 spring onions, finely chopped (+ extra for decorating)

    • ¼ cup / 55g vegan margarine, melted 

    • 2 tbsp olive oil (for frying)


    Method:


    1. Grate your courgette using the thick side of the grater that’s traditionally used for cheese. Place it into a bowl and mix in your salt (this will remove any extra moisture). Leave for 10 minutes.

    2. Using your hands, move the grated courgette into a fresh bowl, squeezing any extra water out as you go. Add in your flour, nutritional yeast, flour, baking powder, garlic, spring onions and melted margarine. Mix well until it all comes together.

    3. Heat up your oil in a large frying pan and using a heaped tbsp of mixture per fritter, place it into the pan and gently push down into a fritter shape using a spoon or spatula. 

    4. Allow to cook for a few minutes on a low to medium heat and then flip using a spatula. Repeat with until all your mix has been used up! 

    5. Serve in a stack with some extra spring onion or chives sprinkled over the top. 


    What did you think of this recipe? Did you do anything differently? We’d love to hear from you in the comments below. Don’t forget that you can share all your foodie makes with us using the hashtag #HBivore.


    Follow us on Facebook and like us on Instagram to keep up to date with our latest recipes, news and content. You can also use the form below to receive all our news straight to your inbox each week.