Her-Bivore Blog

 RSS Feed

Category: Snacks

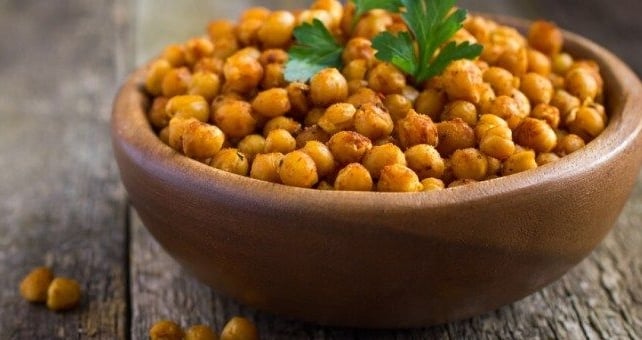
  1. Crispy Roasted Chickpeas Three Ways

    Posted on

    Crispy Roasted Chickpeas Three Ways

    Crispy Roasted Chickpeas Three Ways

    I thought it was about time that I, myself, ought to write another recipe. I’d been hearing a lot about roasted chickpeas and all the different flavours you can do them with.

    Being the Hummus Connoisseur that I am, Chickpeas definitely fall within my spectrum of favourite foods to play around with and so that is the inspiration for this post.

    The first batch I tried was alright. However, two of the flavours were quite soggy because of the flavourings I had used. After consulting with the brains of the operation (Amy), she suggested I use her dehydrator to get rid of the rest of the moisture and leave them deliciously crispy.

    It worked a treat and the flavours were much more prominent. To do a proper job on this recipe, I highly recommend you invest in one of these. They are great for making dried fruits and crisps as well.

    Recipe

    Servings: 1 Ramekin of each flavour

    Total Time: 1H 15M

    Ingredients:

    • 3 Cans of Chickpeas
    • Soy Sauce
    • Mixed Spice
    • Curry Powder
    • Curry Leaves
    • Lemon Juice
    • Ground Ginger
    • Salt
    • Olive Oil

      *No amounts given for flavours as you're just going to liberally chuck them all over

    Method:

    • STEP 1.) Drain your chickpeas and spread them across a tray. You may want to keep the liquid for another recipe. (Noted below**)

    • STEP 2.) Peel the chickpeas. This can be done quickly by simply pinching the base of the chickpea. This ensures that the skin doesn’t carry the flavour and gets crunchy while the chickpea is soft and flavourless.

    • STEP 3.) Coat your chickpeas in olive oil and salt and then put them in the oven at 150c / 300f / Gas Mark 3 for 15 minutes. Make sure to shake the tray occasionally to roast them evenly.

    • STEP 4.) Coat your chickpeas in their flavours in different trays. For curry flavoured chickpeas, coat them in curry powder and drop a few curry leaves in the tray with them. Japanese chickpeas, marinate in soy sauce and mixed spice and for lemon and ginger chickpeas, marinate in lemon juice and ground ginger.

    • STEP 5.) Roast them for another 15 minutes. Again, making sure to shake them occassionally.

    • STEP 6.) If you don’t have a dehydrator, switch your oven off and leave the chickpeas in while it cools. This won’t produce as good results but will still help take some of the moisture out. If you do have a dehydrator, turn it on at 60c and leave for 5 hours.

    **AQUAFABA CHOCOLATE MOUSSE RECIPE

    What flavours are you going to try?
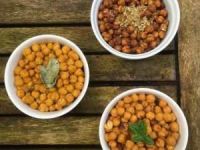
    chickpeasObviously, you can do whatever flavours you want and if there’s one you like, you can do three tins of that instead.

    The good thing about this recipe is that you can be as creative as you like and that’s what I live for when it comes to cooking. Experimenting and trying new things.

    We shared these at a barbecue and it became a talking point. Food brings us all together. What flavours do you think would work well? I’d love to hear your thoughts and see your recipes! Share them with us in the comments below or on our Facebook page.

    <<BACK TO SNACKS

    Written by Jack Ricketts
    -Him-Bivore
    Marketing has always been my career focus. I am striving to promote a plant-based lifestyle to the masses through positive campaigns and sharing the benefits of veganism. The animals, and the planet, need us more than ever to make a change. 
    You can find me on Instagram


  2. Smokey Paprika Falafels

    Posted on

    Falafels

    Falafels

    One of the main things I love about falafels; aside from their delicious taste and fluffy texture; if that they are just so versatile. I put them with pastas or salads, or eat them on their own or with hummus. 

    If you're after a spicier falafel instead, simply add a little bit of chilli powder to your mix. Be careful not to cover up those delicious flavours though!

    Recipe

    Prep Time: 20 minutes

    Total Time: 35 minutes

    Yield: 15 falafels

    Ingredients:

    • 1 Cup / 200g Chickpeas (msut be from a tin, drained.)
    • 1 tbsp Dried Corriander
    • 1/2 Large White Onion, finely diced
    • 1 tbsp Dried Parsley
    • 1 tsp Salt
    • 3 Cloves of Garlic
    • 1 tsp Cumin
    • 1 tsp Tumeric
    • 1 tsp Smoked Paprika
    • 5 tbsp Plain Flour
    • 1 tsp Baking Powder
    • Vegetable Oil (for frying)

    Method:

    1. Place your chickpeas, onion, parsley, garlic, paprika, cumin and tumeric into a food processor and blend until combined but not pureed.

    2. Add your baking powder and flour and pulse until your mix formsa ball and is no longer sticky. You can add a bit more flour if you need to.

    3. Move your mix into a bowl and leave in the fridge for at least 3 hours, but overnight is best.

    4. Form your mix into small falafel-sized balls, and then heat your oil for frying them. You'll need about 3-4 inches of oil depending on how big your falafels are.

    5. Only cook a few at a time, and if they're falling apart, smoosh your uncooked ones back together and add a bit more flour to your mix. 

    6. Cook until they're nicely golden brown and then leave to drain on a clean kitchen towel.

    Next

    So how are you planning to eat your falafels? Are you going to add them to a dish or are you just going to dive straight in with some dips? We'd love to know! Especially if you tweaked the recipe in any way.

    If you enjoyed this recipe, you should check out our Roasted Chickpeas Recipe. They also make for a great snack whether for yourself or for a party!

    550603215183

    On to Roasted Chickpeas Recipe >>

    << Back to Snacks

    Written by Amy Northwood
    Her-Bivore
    My passion for food and conservation has led me to where I am now! My aim is to show people that veganism can be diverse, tasty and adapted to fit every lifestyle and budget!
    You can find me on Instagram

    Amy Northwood - Her-Bivore


  3. Vegan Scones (Fruit or Plain!)

    Posted on

    VeganScones

    Vegan Scones

    Scones, a must have for any Afternoon Tea or Cream Tea. While they originated in Scotland in the early 1500s, they’ve come a long way since then, and now you can make your own vegan scones which taste as good as any other!

    I split my mix in half and made 5 fruit and 5 plain, but you can do all plain by leaving the fruit out completely or all fruit by adding double the amount of fruit and adding it to the lot.

    You’ll want a 3inch round cutter for cutting them out. You could make mini scones, but you’ll need to adjust your cooking times accordingly. 

    Recipe

    Servings: 10

    Total Time: 25

    Ingredients:

    • 500g/3.25 cups self raising flour
    • 125g/0.5 cups vegan margarine
    • 100g/1/2 cup caster sugar
    • 2tsp baking powder
    • 200ml/ 1 cup water
    • 115g/ 0.75 cups raisins (optional)

    Method:

    • STEP 1: In a mixing bowl, add your baking powder, flour and vegan margarine and rub between your fingers until it forms a breadcrumb texture.

    • STEP 2: Add your sugar and mix in, then place the bowl onto an electric mixer, add your water and use the beater to gently mix until combined.

    • STEP 3: Your mix should be a nice dough texture. Remove from the bowl and mix in your rasins

    • STEP 4: On a floured surface, gently knead your mix and add a little flour if its too soft, roll it out so its about 4cm thick. Use your cutter to cut the scones out and place them on a papered baking tray. Keep remoulding and rolling your mix until you’ve used it all up.

    • STEP 5: Bake for 12-15 minutes or until they look golden brown. Another good way to test is to take one off the tray, and gently tap the bottom, it should sound hollow.

    • STEP 6: Serve warm with vegan margarine and jam or cool completely and store in an airtight container. These are also great for freezing, just make sure you give yourself enough time for them to fully defrost before eating!

    How did you get on?

    The vegan scones in our house were “scone” before we knew it…. *queue tumbleweed*

    Did you make any changes to the recipe? Did you have any additions? Most importantly, jam or vegan cream on top?? We’d love for you to share your thoughts with us!

    << Back To Snacks

    Written by Amy Northwood
    Her-Bivore
    My passion for food and conservation has led me to where I am now! My aim is to show people that veganism can be diverse, tasty and adapted to fit every lifestyle and budget!
    You can find me on Instagram

    Amy Northwood - Her-Bivore


  4. Raw Vegan Cookie Dough Bites Recipe

    Posted on

    cookiedough

    Raw Vegan Cookie Dough Bites

    I think there’s something we can all agree on, vegans and non-vegans alike: raw cookie dough is amazing.

    It’s better than cookies themselves, so why bother baking it?

    We’ve all heard the rumours that raw cookie dough is not safe to eat, and this is partly due to the eggs. Fortunately, due to this being a vegan cookie dough recipe that’s not a concern!

    The other possible safety issue falls to the flour though, it is crucial to ensure the flour has been heated to a high enough temperature to remove any possible e-coli that may be present in raw flour, this is why you'll see in the recipe to heat the flour in the microwave to 72c.

    Another thing to note if you like in America is that not all American sugar is vegan. You’ll need to buy organic. Sugar in Europe is generally fine. You can check out one of my previous posts to make sure you're not buying into any nasty surprises.

    This is a great easy recipe to make with kids, especially impatient ones who don’t want to have to wait for anything to bake! That said, the same reasoning can be applied to many adults, and if you haven’t got the patience to bake cookies, you probably skipped straight past this introduction anyway, so without further ado!

    Recipe

    Servings: 15-20

    Total Time: 15M

    Ingredients:

    • 1 1/4 cups (175g) plain flour
    • 1/2 cup (110g) vegan margarine (I used pure)
    • 1/2 cup (110g) light brown sugar
    • 1/3 cup (70g) caster sugar
    • pinch of salt
    • 2 tbsp almond milk
    • 1 tsp vanilla extract
    • 3/4 cup (130g) vegan dark chocolate chips
    • 1 tbsp vegan sprinkles

    Method:

    • STEP 1: Place your flour in a microwave safe bowl and heat on full power for 45-60 seconds, until the centre of the flour is at least 72c.

    • STEP 2: In an electric mixer, combine the vegan margarine, brown sugar, caster sugar and salt. Leave to mix for about 3 minutes until pale and fluffy.

    • STEP 3: Stir in your almond milk and vanilla extract. Fold in your flour until combined.

    • STEP 4: Stir in your chocolate chips and sprinkles. If you want a more aesthetic look, leave some to one side to push in once you’ve shaped the balls.

    • STEP 5: For rougher edges, you can use an ice cream scoop, but otherwise, use one tablespoon of the mix at a time, and roll in your hands to form balls. Place on baking paper.

    • STEP 6: Serve immediately, or alternatively store in an airtight container in the fridge. This vegan cookie dough is also suitable for freezing!

    What do you reckon?

    Chocolate CupcakesThese cookie dough bites didn't stick around long in our house! Did you make any changes to the recipe?

    We made them again and put them on top of some of our cupcakes!

    Check out the Cupcake Recipe

    <<Back to Snacks

    Written by Amy Northwood
    Her-Bivore
    My passion for food and conservation has led me to where I am now! My aim is to show people that veganism can be diverse, tasty and adapted to fit every lifestyle and budget!
    You can find me on Instagram

    Amy Northwood - Her-Bivore