Her-Bivore Blog

 RSS Feed

Category: Snacks

  1. Sun-Dried Tomato and Thyme Share Bread

    Posted on

    ShareBread

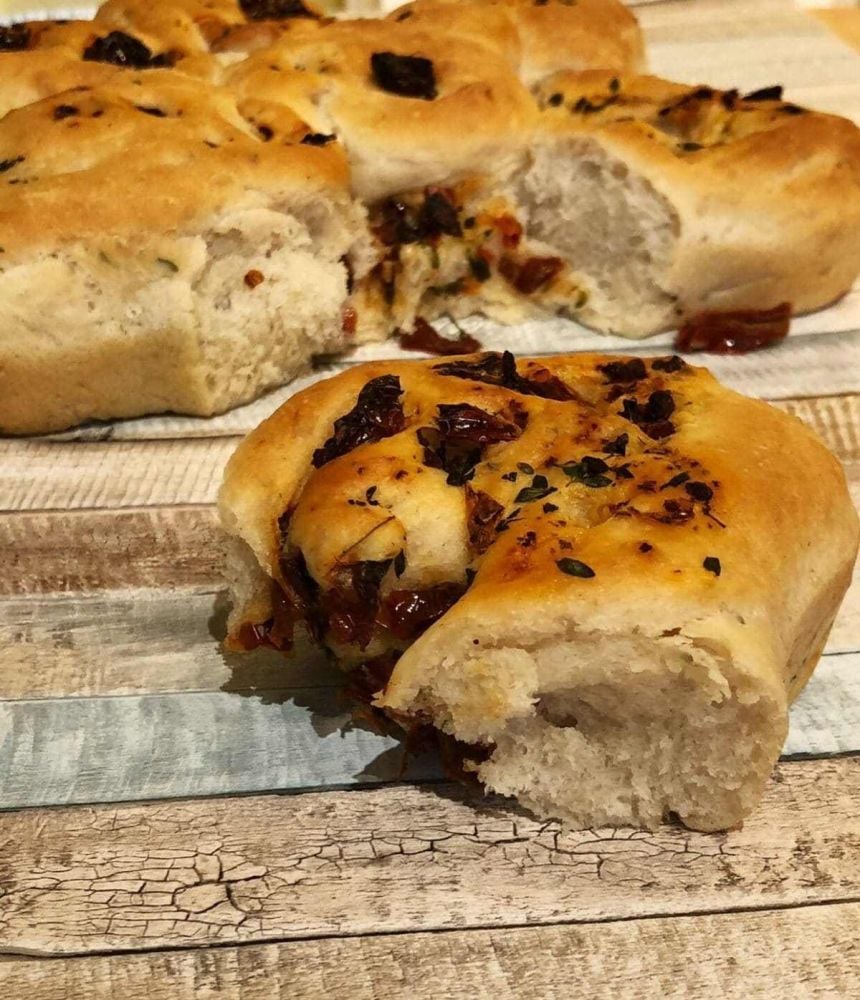
    Sun Dried Tomato and Thyme Share Bread

    This share bread is something special. As soon as I took it out of the oven, I knew I had to do the recipe for it. The smell was just overwhelmingly delicious. We all know how perfect baking your own bread is for really making a house smell like a home, but the addition of the sun dried tomatoes and the thyme really blew me away.

    Even as I’m sat writing this, I have a piece of it to the side of me to nibble on!

    Bread is a great staple food and has been since it was first created in Egypt in 300 BC, and It’s believed that bread was first created as the result of some floating yeast landing in a bowl of thick gruel.

    Luckily for my recipe, you don’t need any thick gruel. Instead, this flavoursome share bread is soft, light and delicious.

    The flavours are completely interchangeable, I opted for the fairly simple flavour choice of sun-dried tomato and thyme, but you could easily adapt this recipe for a walnut or a garlic bread by simply adding those to the mix that you spread over before you roll the dough.

    I used a fancy ‘tear and share’ bread baking dish, but you don’t need it to do this recipe. Simply lay your bread out on a papered baking tray positioned close together and you’ll get a similar result.

    Let me know how you got on in the comments below, and as always make sure you tag us in all your foodie makes on instagram and follow us on Facebook to keep up to date with the latest recipes and news!


    Recipe

    Yield: 1 large share bread (feeds 4-6)

    Total Time: 1 Hour 30 Minutes

    Ingredients:

    • 2 cups / 250g Plain Flour (+ extra)

    • 1/4 cup / 60ml Olive Oil

    • 1/2 cup / 30g Sun Dried Tomatoes

    • 1/2 tsp Salt and Pepper

    • 4 tsp Fresh Thyme

    • 1 tsp Sugar

    • 2 & 1/2 tsp Instant Dry Yeast

    • 1 tsp Salt

    • 1 ¼ / 300ml cups Lukewarm Water


    Method:

    1. Place your water in a bowl, and sprinkle your yeast and 1/2 teaspoon salt on top. Leave for five minutes, then stir and leave for a further five minutes.

    2. In a mixing bowl, with your dough hook attachment, combine your yeast mix, sugar, 2 tsp of chopped thyme and 2 cups of your plain flour. This mix will be very sticky and loose, don’t worry!

    3. On a large, clean surface, sprinkle a good amount of flour, and then tip your dough mix on top, and begin to work the extra flour in. You’ll need to keep adding more flour to stop it sticking to the work surface. You want to keep doing this until it forms a ball of dough, that is slightly sticky. Then knead for another 3-4 minutes. Place your dough into an oiled bowl, and then turn over, so the whole dough is coated with oil. Cling film and leave your dough in a warm place for 20 minutes.

    4. While you’re waiting for your dough, chop your sun-dried tomatoes and remaining thyme. Then add to 1 tbsp of oil and season with salt and pepper. (If you’re using different ingredients, just use the same method with them).

    5. On a large baking tray, add a tbsp of oil and spread it on the tray to form a thin layer. Add your dough (after the 20 minutes) and using oiled fingers, push the dough until it forms a large square.

    6. Spread your filling mix on top evenly (this is what you just chopped up). Then starting from the longer side, roll your dough up to form a big long roll!

    7. Cut your dough into 7 evenly sized pieces, and either place them into your ‘tear and share’ baking dish or place them on a papered baking tray in a pattern of one in the centre and the remaining 6 positioned around, just touching, like a flower.. Cover with a clean cloth and leave to rise for about 45 minutes in a warm room until they’ve doubled in size. At this point, preheat your oven to 200c.

    8. Bake for 15-20 minutes, until golden brown and crisp to the touch. Remove from the oven and allow to cool for a few minutes, then remove from the dish and enjoy warm.


    What did you think of this recipe? Did you do anything differently? We’d love to hear from you in the comments below. Don’t forget that you can share all your foodie makes with us using the hashtag #HBivore.


    Follow us on Facebook and like us on Instagram to keep up to date with our latest recipes, news and content. You can also use the form below to receive all our news straight to your inbox each week. 


    Written by Amy Northwood
    Her-Bivore
    My passion for food and conservation has led me to where I am now! My aim is to show people that veganism can be diverse, tasty and adapted to fit every lifestyle and budget!
    You can find me on Instagram

    Amy Northwood - Her-Bivore


  2. Rosemary Sweet Potato Fries

    Posted on

    sweetpotatofries

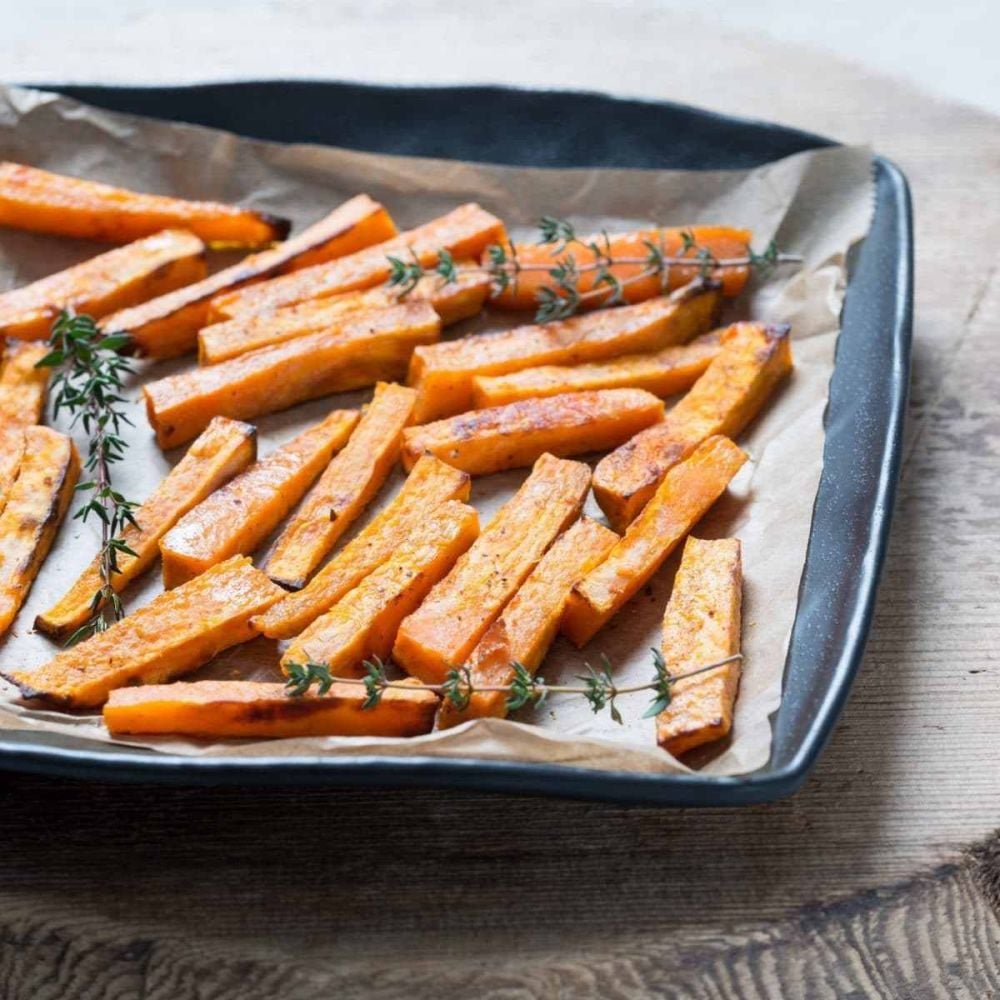
    Rosemary Sweet Potato Fries

    Chips are my weakness, just as I'm sure they are many other vegan's weaknesses.

    In fact, when people say "oh wow! You're vegan? You must be so healthy", the reason why I laugh is probably because almost instantaneously, fries come to mind. With all the vegan options available nowadays, it's easy to forget all those times I found myself in a restaurant where the only two things I could order that we’re vegan were fies and alcohol…

    As delicious as fries are, something we just need a bit of a change, and that's where sweet potato takes the spotlight,

    They're healthier, and if you limit your use of oil and dont deep fry, these definitely count towards your five-a-day too! If you’re like me and you like skinny fries, follow this recipe exactly, but if you want thicker cut oven style chips or even wedges, just cut your sweet potatoes thicker. You’ll need to cook them for a little longer but they’ll still come out deliciously crispy on the outlight and delicately fluffy on the inside.

    I absolutely love this combination of flavour from the herbs and spices, but if you have something else in mind we’d love to hear about it in the comments below. You can keep them plain if you prefer, just season with sea salt and cracked black pepper instead.

    Enjoy!


    Recipe

    Yield: 4 potions as a side or 2 as a snack

    Total Time: 30 minutes

    Ingredients:

    • 2 large sweet potatoes

    • A few good sprigs of rosemary

    • 2tbsp cornflour

    • 1tbsp oil

    • 1/2 teaspoon paprika

    • 1/2 teaspoon garlic powder

    • 1/2 teaspoon black pepper

    • Salt to taste

    Method:

    1. Preheat your oven to 210c. Peel your sweet potatoes and cut them into fries, then leave to soak in a bowl of cold water for one hour.

    2. Drain your sweet potato and pat dry using a clean kitchen towel. In a bowl toss your fries in the cornflour, then add the paprika, garlic, oil and pepper.

    3. Toss your sweet potato fries in your oil mix, and then lay out on a tray, top with your rosemary and bake  for 15 minutes, then turn over and bake for another 10 minutes. Salt to taste and serve!


    What did you think of this recipe? Did you do anything differently? We’d love to hear from you in the comments below. Don’t forget that you can share all your foodie makes with us using the hashtag #HBivore.


    Follow us on Facebook and like us on Instagram to keep up to date with our latest recipes, news and content. You can also use the form below to receive all our news straight to your inbox each week. 


    Written by Amy Northwood
    Her-Bivore
    My passion for food and conservation has led me to where I am now! My aim is to show people that veganism can be diverse, tasty and adapted to fit every lifestyle and budget!
    You can find me on Instagram
    Amy Northwood - Her-Bivore


  3. Vegetable Soup

    Posted on

    599919570582

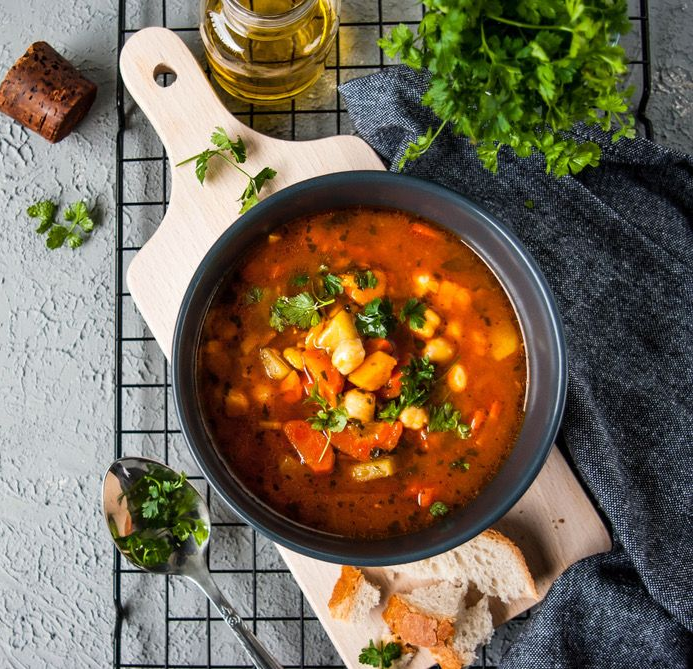
    Hearty Vegetable Soup

    I always find that soups are a bit of an underrated part of society, often seen as a starter instead of the main event. I love soups, which you can probably tell from my vast array of soup recipes such as:

    I’m a big fan of vegetable soup simply for its ease and simplicity. I like to make a big batch every so often when I’m getting overrun with vegetables and then freeze it down for quick and easy meals.

    This is also a great one for taking to work! As a student paramedic, I often find myself in the depths of winter, and not being able to feel your fingers when you need to put in a cannula can be scary, so having a thermos of soup and a little thermal cup can (literally) be a life saver. It’s that little taste of home and comfort you need every now and then.

    If you haven’t got all these vegetables, or you’ve got some of your own that need using up, feel free to swap them in! This soup is designed to be versatile and convenient, as well as delicious.


    Recipe

    Yield: 4 portions

    Total Time: 1 hour 

    Ingredients:

    • 2 tbsp olive oil

    • 1/2 large white onion, chopped

    • 2 celery stalks, chopped

    • ½ courgette, chopped

    • 2 carrots, peeled and chopped

    • 1/2 swede, peeled and chopped

    • 1 parsnip, peeled and chopped

    • 1 yellow bell pepper

    • 1 medium sweet potato, peeled and chopped

    • 3 cloves garlic, minced

    • 1-2 tsp mild curry powder (or hotter if you prefer)

    • 1 tbsp chopped thyme or coriander

    • 1 tin chopped tomatoes (400g)

    • 1L vegetable stock or broth

    • 1 large handful of chopped kale or baby spinach

    Method:

    1. Heat your 2 tbsp olive oil in a large pan on a medium heat. Once hot, add in all your vegetables but your leafy greens ( that’s your onion, celery, courgette, carrot, swede, parsnip, pepper and sweet potato). Gently sweat them off for about 10 minutes, until they start to soften.

    2. Add in your garlic, curry powder and chopped herbs, stir frequently for about a minute. 

    3. Pour in your tinned tomatoes and vegetable stock, bring the whole soup to the boil and then reduce to a simmer and cook for about 25 minutes or until your veggies are cooked. 

    4. Add in your greens and allow to simmer for about 5 minutes, until your greens are cooked.

    5. Remove from the heat and season to taste with salt and cracked black pepper, the amount of salt you’ll need to add will depend on your brand of veg stock.

    6. Divide into bowls and serve with fresh crusty bread. Alternatively, divide into containers and allow to cool completely before placing on the lid and either storing in the fridge or freezer.


    What did you think of this recipe? Did you do anything differently? We’d love to hear from you in the comments below. Don’t forget that you can share all your foodie makes with us using the hashtag #HBivore.

    Follow us on Facebook and like us on Instagram to keep up to date with our latest recipes, news and content. You can also use the form below to receive all our news straight to your inbox each week. 


    Written by Amy Northwood
    Her-Bivore
    My passion for food and conservation has led me to where I am now! My aim is to show people that veganism can be diverse, tasty and adapted to fit every lifestyle and budget!
    You can find me on Instagram
    Amy Northwood - Her-Bivore

  4. How To Make Box Cake Mix Into Vegan Cupcakes

    Posted on

    558990061249

    Box Cake Mix Cupcakes

    If you're looking for a cupcake recipe to test your skills then this is not for you! This vegan chocolate cupcake recipe is the almost ‘too good to be true’ cheats way to get perfect vegan cupcakes every time, especially considering there are only two ingredients you need to worry about, and they're both already measured out for you!

    They're lovely and moist and are perfect for parties or maybe even a naughty treat for yourself! It is worth mentioning that if you'd prefer one big cake then the method is just the same. You just have to make sure to adjust your cooking times accordingly, I find that they take longer to cook because the mix is slightly wetter than if you’d made them according to the box.

    If chocolate isn’t your thing (or if you fancy a change) this works with pretty much all the Betty Crocker mixes! The only box cake that isn't vegan from that range is the red velvet, due to the sourcing of the colouring.

    I’ve heard that there are some cheaper brand of box cake that work just the same, but I’ve never tried them so please let us all know in the comments if you’ve tried any other and whether they work!

    For this recipe you literally just need the box cake and a can of any carbonated beverage. I’ve made them with soda water, lemonade, cola, diet cola, honestly as long as it bubbles it should work.

    How does 330ml of carbonated drink replace the other ingredients? Why did someone ever try this in the first place? Your guess is as good as mine, but I’m glad it does and I’m glad they did.

    The good news is that the betty crocker icing range is almost pretty much all vegan too, and if you’re new to veganism the cadburys chocolate icing (and fudge icing!) are accidentally vegan too! If you want this type of icing to set though, you’ll have to pop them in the fridge when they’re iced.

    Recipe

    Total Time: >30 minutes

    Yield: 10 cupcakes

    Ingredients for the cupcakes:

    1 Box of Betty Crocker's Devils Food Cake Mix

    1 330ml Can of Carbonated Drink (I used diet cola)

    Ingredients for the icing:

    1 Tub of Betty Crocker's Chocolate Fudge Icing

    Method:

    1.) Preheat your oven to 180c. Empty the contents of the cake mix into a large mixing bowl and then add the can of coke. You should then whisk this mixture until it has combined, don’t worry about the bubbles, they’ll go.

    2.) Spoon your mix into your prepared cupcake cases. You want each one just over half full because this will give it space to rise. You won't get as many as the packet says, as you're not adding as much quantity to it as instructed but I usually get about 10 cupcakes.

    3.)Then bake for around 15-20 minutes, or until a rounded knife or cocktail stick inserted fully into the centre of a cupcake comes out clean and then cool on a wire cooling rack. 

    4.) Allow your cupcakes to cool completely. Using a piping bag with a nozzle, pipe the icing onto the cupcakes (if you haven't got a bag or nozzle handy, you can just use the back of a spoon to spread the icing onto the cakes). You can then either top with any vegan decorations, or just leave them plain! Then allow the icing to set completely and then store in an airtight container in the fridge.

    How Did You Get On?

    What did you think of this recipe? Did you do anything differently? We’d love to hear from you in the comments below. Don’t forget that you can share all your foodie makes with us using the hashtag #HBivore.

    Follow us on Facebook and like us on Instagram to keep up to date with our latest recipes, news and content. You can also use the form below to receive all our news straight to your inbox each week. 


    Written by Amy Northwood
    Her-Bivore
    My passion for food and conservation has led me to where I am now! My aim is to show people that veganism can be diverse, tasty and adapted to fit every lifestyle and budget!
    You can find me on Instagram

    Amy Northwood - Her-Bivore