Her-Bivore Blog

 RSS Feed

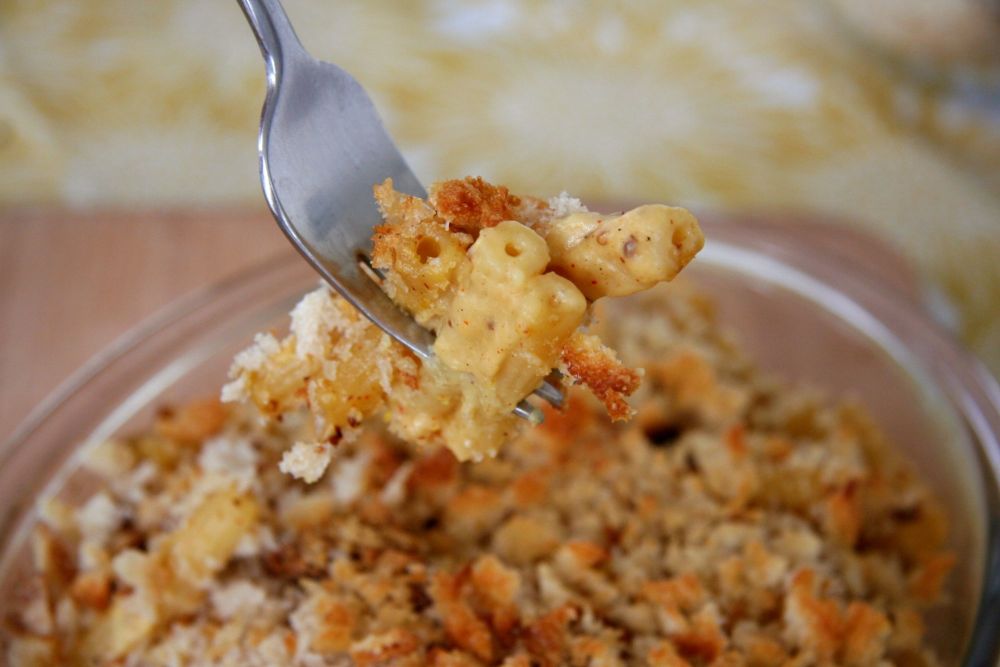
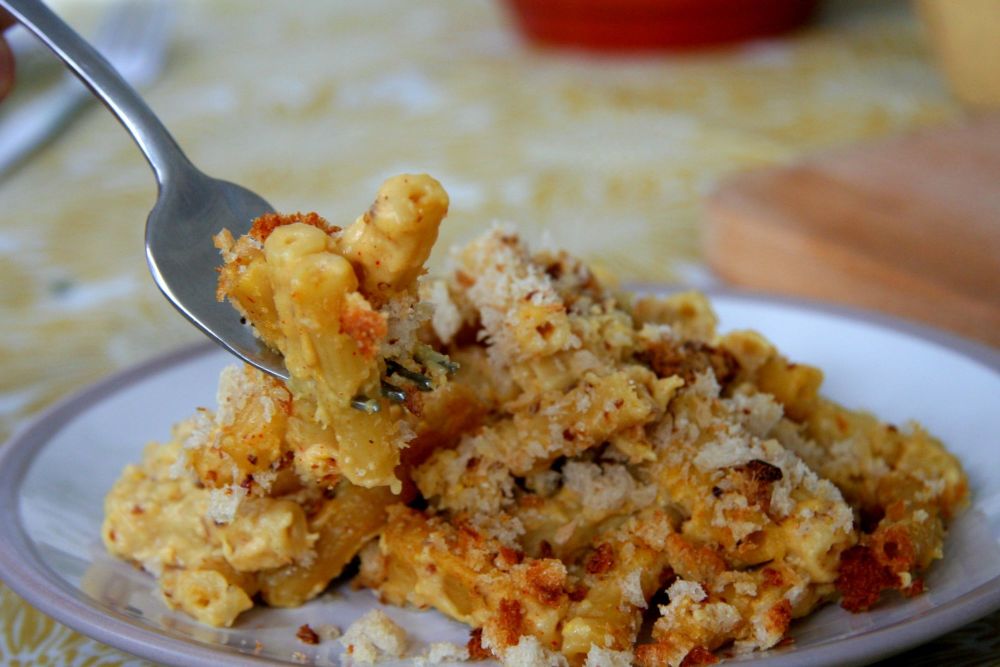
  1. mac n cheese close up on fork

    Mac 'n' Cheese - No Cashews!

    Mac ‘n’ cheese, the long-standing comfort food across nations. Comparable to a blanket, open fire & a Harry Potter marathon - or maybe that’s just me. Regardless, mac ‘n’ cheese is one of the most popular dishes that spring to mind when you think of foods that taste like home. 

    There are a few things a mac ‘n’ cheese needs to be in order to fit my home comfort criteria:

    • Creamy

    • Rich

    • Cheesy

    • Gooey

    • Filling (for both body & soul)


    This mac ‘n’ cheese ticks all the boxes. 

    Traditionally you’ll want to use macaroni pasta (also known as elbow pasta), but for some reason every time I got to make a mac ‘n’ cheese recipe, I never have any in the cupboards, so like with all things in the kitchen, a little improvisation was in order. 

    The bread crumbs are a nice addition I originally saw on Pinterest, vegan cheese isnt known for its beauty and ability to melt freely on the top of a dish, so breadcrumbs make a nice change and I find a bit more aesthetically pleasing. 

     I had a sourdough around that was a few days old and it made the absolute perfect breadcrumb addition to the mac ‘n’ cheese, adding a subtle crunch to go with the thick, gooey cheesy sauce. You can use any bread you have around, but if it’s fresh, I advise gently toasting under a grill for a few minutes on each side so you really get that bread crumb crunch.

    What cheese you use is completely up to you, I used the Violife grated, but any grated vegan cheese will do, some melt at slightly higher temperatures or take a little longer to melt than others so don’t be disheartened if yours takes a little while, a bit of perseverance and a whisk and you’ll have a smooth creamy sauce in no time. 

    As with all mac ‘n’ cheese, one of the highlights is just how quick and easy it is to make, and this recipe is no different, as a basic rundown:

    • Cook & drain your pasta.

    • Whisk together the bits for your cheese sauce, allowing it to come to the boil and thicken.

    • Stir your pasta into your cheese sauce & pop it into an oven proof dish.

    • Top with breadcrumbs, drizzle with a little melted butter & bake for 15-20 minutes.

    If you want some added vegetables, stirring in some cooked broccoli and peas makes a fantastic addition. You can also top with more grated cheese if you like, but I find the breadcrumbs on top add enough. 

    The full in-depth recipe is below, and I have no doubt you’ll love this recipe as much as I do, but if you try anything different, let me know in the comments below!
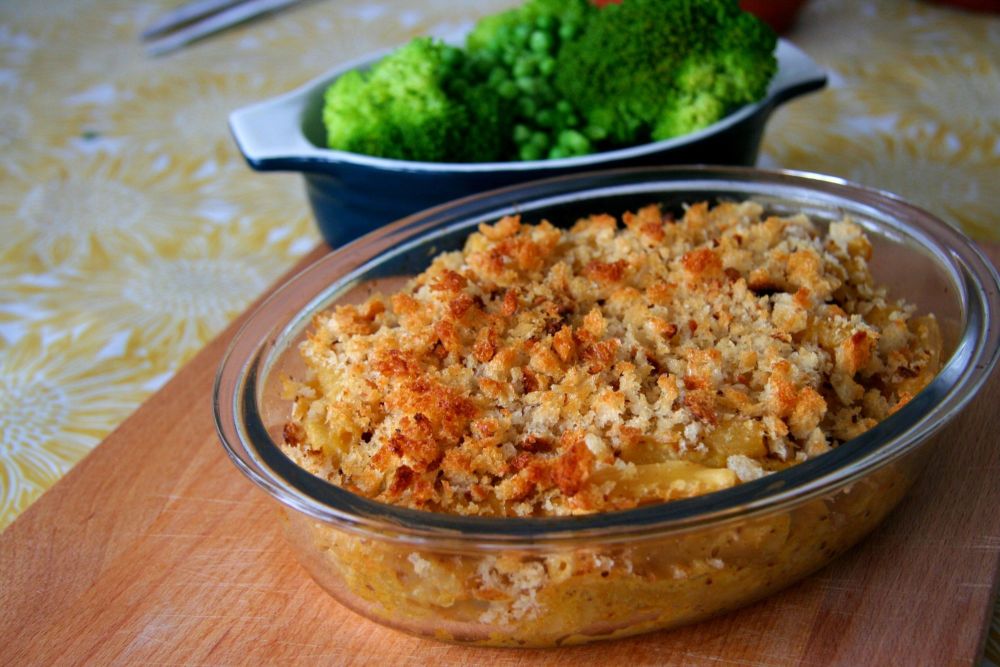
     

     Cashew mac n cheese with vegetables in background


    Recipe

    Yield: 4 portions 

    Total Time: 1 hour 20 minutes 

    Ingredients:

    For the Cheese Sauce:

    • 2 tbsp margarine

    • 4 tbsp plain flour

    • 2 cups / 500ml non-dairy milk (I used soya)

    • ½ cup / 30g nutritional yeast

    • 80g grated vegan cheese

    • 1 tsp onion powder

    • 1 tsp paprika

    • 1 tsp garlic powder

    • 1 tsp wholegrain mustard

    For the Pasta:

    • 250g dried macaroni pasta

    For the Breadcrumbs:

    • 2 slices thick-cut sourdough

    • 1 tbsp vegan margarine, melted


    Method:


    1. Cook your pasta as per instructions on the packet, drain and set to one side. At this time, preheat your oven to 200c.

    2. In the meantime, place your margarine in a pan on a medium heat, once melted add your plain flour and whisk until it all comes together.

    3. Pour in your non-dairy milk and whisk until all the lumps are removed.

    4. Add your nutritional yeast, grated cheese, onion powder, paprika, garlic powder and wholegrain mustard and whisk until combined. You may need to give your cheese a while to come up to temperature and melt. Make sure to keep whisking regularly to avoid your sauce catching on the bottom of your pan, as it comes to the boil it will thicken. 

    5. Once thickened and combined, remove from the heat, fold in your pasta and transfer to a large ovenproof dish.

    6. Tear up your sourdough and using a food processor, process until it becomes coarse breadcrumbs. Sprinkle a thick layer of breadcrumbs over your dish of mac ‘n’ cheese and then drizzle over your melted margarine.

    7. Place in your preheated oven and bake for 15-20 minutes or until your breadcrumbs are golden brown.


     mac n cheese on plate


    What did you think of this recipe? Did you do anything differently? We’d love to hear from you in the comments below. Don’t forget that you can share all your foodie makes with us using the hashtag #HBivore.


    Follow us on Facebook and like us on Instagram to keep up to date with our latest recipes, news and content. You can also use the form below to receive all our news and free recipes straight to your inbox!

    Written by Amy Northwood
    Her-Bivore
    My passion for food and conservation has led me to where I am now! My aim is to show people that veganism can be diverse, tasty and adapted to fit every lifestyle and budget!
    You can find me on Instagram

    Amy Northwood - Her-Bivore


    Get Notified When We Launch...
    • This site is protected by reCAPTCHA and the Google Privacy Policy and Terms of Service apply.


  2. Overnight Oats

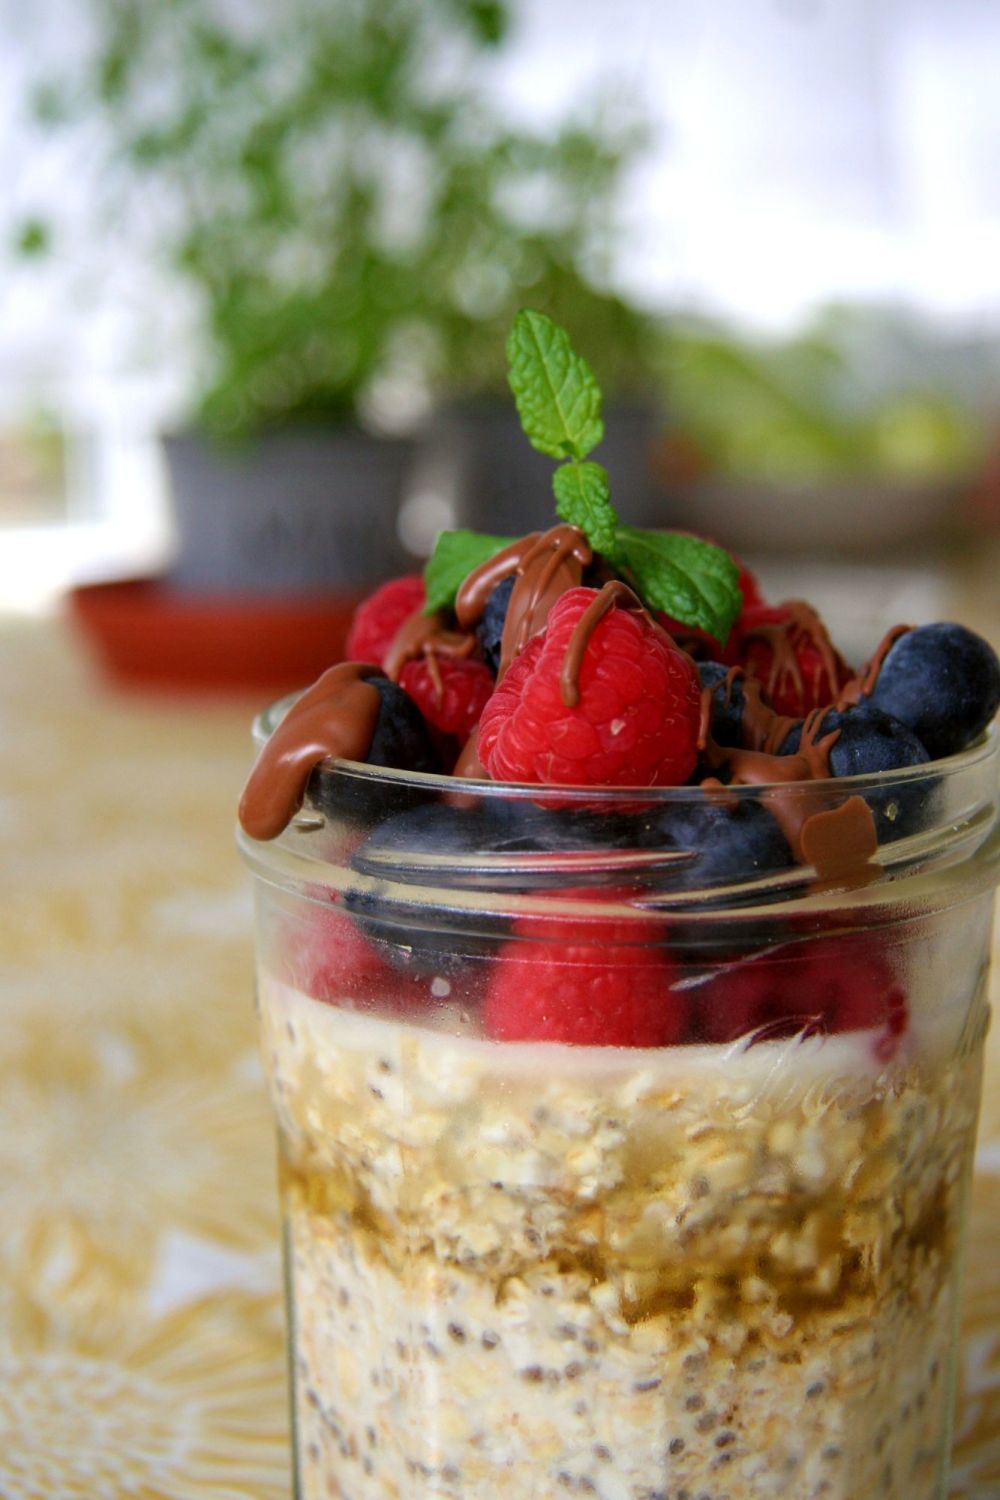
    overnight oats close up

    Overnight oats are honesty the perfect staple for anyone. You can prepare them in advance and then have them as quick on the go breakfast, or a snack to get you through the day. You can top them with anything you want from granola to chocolate, but here are some of my favourites:

    • Sliced banana

    • Fresh berries

    • Frozen berries

    • Dried fruits

    • Granola

    • Nut butter

    • Maple syrup

    • Chocolate 

    • Trail mix

    • Jam

    • Biscoff spread

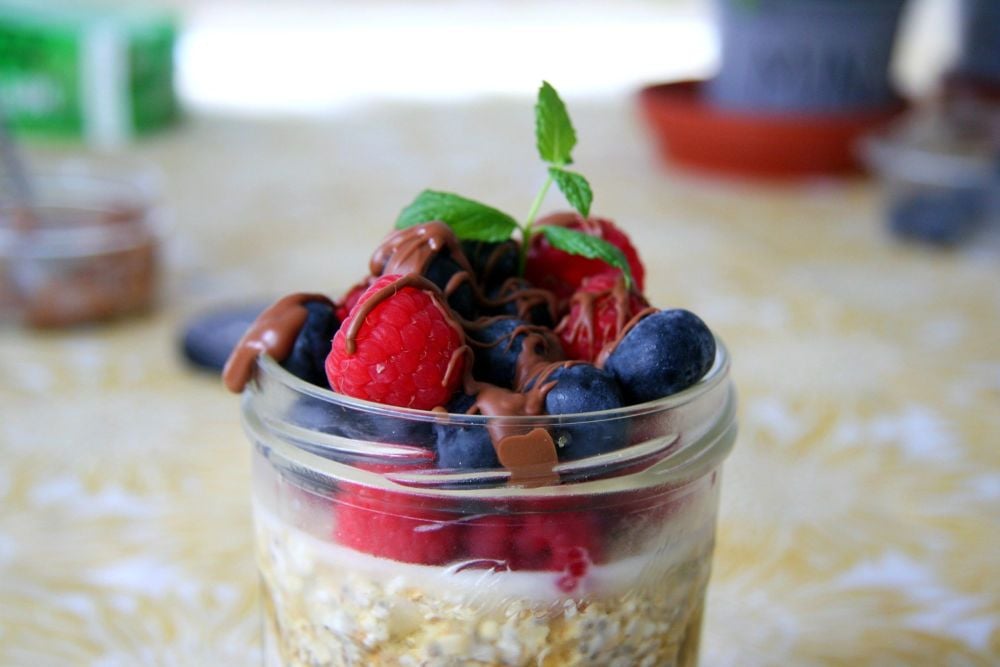
    overnight oats berries close up

    One problem I have with a lot of the overnight oats you see on the internet is the number of unhealthy toppings. Of course, you’re welcome to put whatever you want, and sometimes it can make a really special treat. 

    Generally, I like to limit the amount of added processed sugars I put with mine, the oats provide a great source of slow-release energy & the berries are a fantastic source of vitamins and antioxidants.

    My overnight oat recipe also contains chia seeds, these are a brilliant superfood which - as well as providing a thicker result in texture - also come with a huge amount of health benefits! You can read all about chia seeds in my blog post here! If you haven’t got any chia seeds, don’t worry. You can substitiure flax seeds in their place, or you can just leave them out entirely, however you may have a slight change in texture of the mix.

    If you get to your oats after they’ve had time to soften and think you’d prefer them a bit runnier, you can stir in a bit more milk just before you eat them!

    Another little addition that can really spice things up (pun completely intended) is the spice you choose to put in! I absolutely love cinnamon so thats generally my go-to, but around christmas time i like to put in a bit of ground ginger or nutmeg instead to change things up and give me a little festive kick.

    Now, whilst these are traditionally called overnight oats, you actually only need to leave them for about 2-3 hours before they’re ready to eat, so if you do forget they can be available at fairly short notice too. On the other side, they will last for up to 5 days in the fridge, so you can meal prep your working week of breakfasts all in one go! If you’re meal prepping, I would only prepare your oaty mixture and leave your additional toppings to go on fresh just before eating. 

    I hope you enjoy this recipe, please let me know in the comment below which variations and toppings you tried! You can also tag us in your instagram posts for a chance to be featured on our page! 

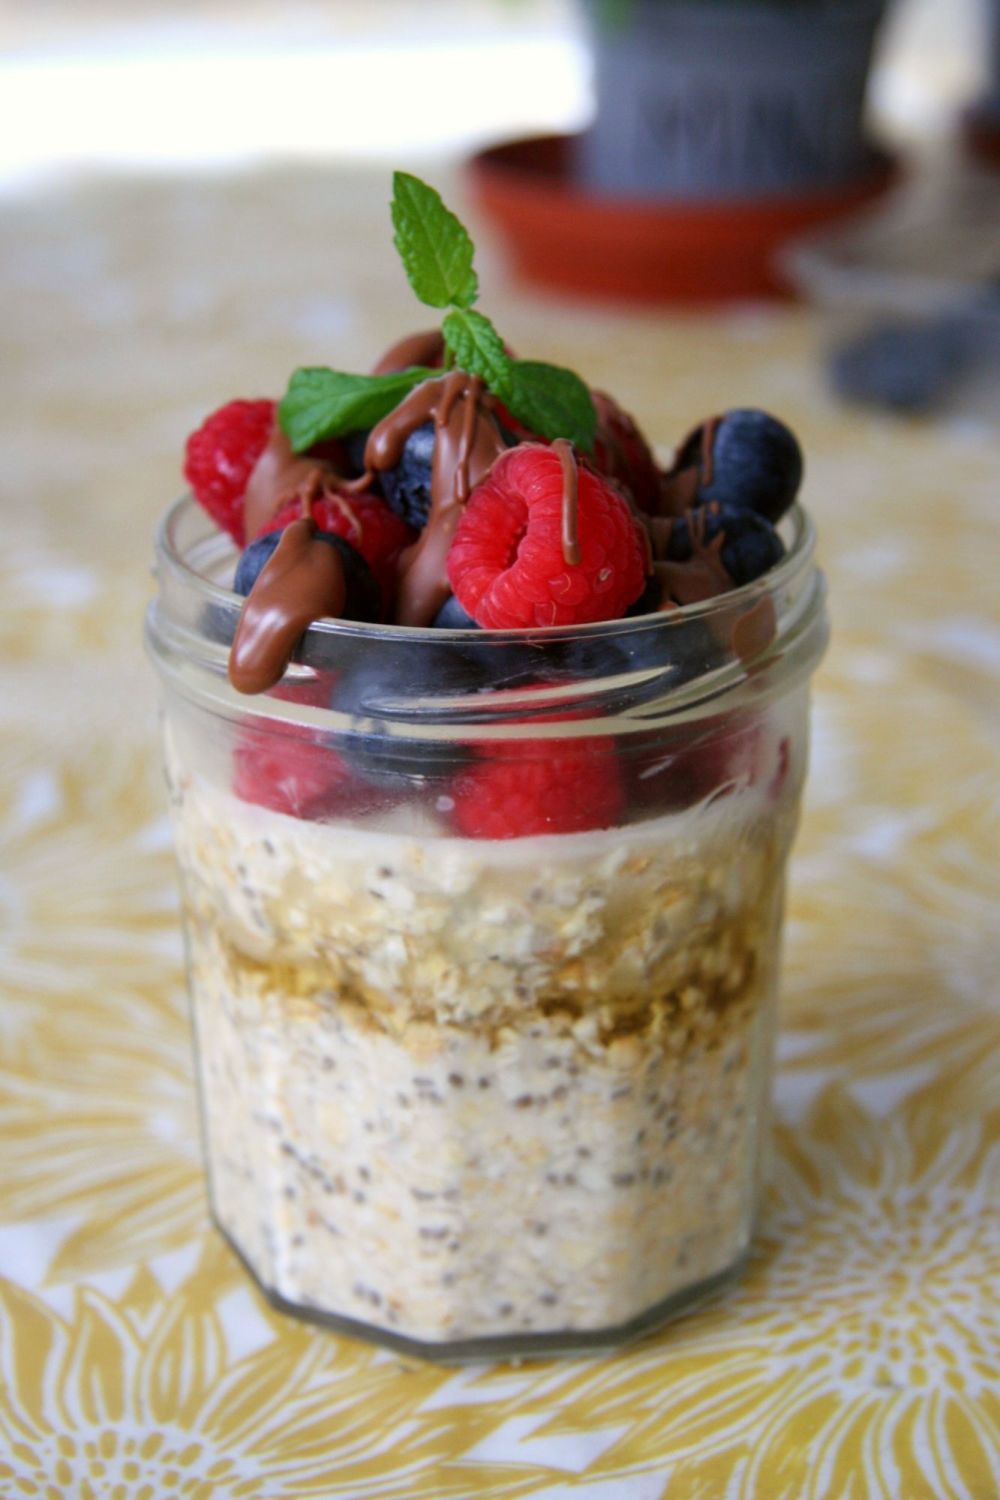
     whole photo overnight oats


    Recipe

    Yield: 2

    Prep Time: 5 minutes

    Setting Time: 2 hours

    Total Time: 2 hours 5 minutes

    Ingredients:

    For the rolled oats:

    • ¾ cup rolled oats

    • ¾ cup non-dairy milk (I like to use oat or coconut)

    • 1 tsp vanilla extract

    • 1 tsp ground cinnamon or ground ginger

    • 2 tsp chia seeds

    To top:

    • Fresh berries

    • 10g chocolate, melted

    • Mint to garnish (optional)


    Method:

    1. Add your oats, non-dairy milk, vanilla extract, spice and chia seeds to a mason jar.

    2. Mix well, pop the lid on and pop in the fridge for a minimum of 2-3 hours.

    3. Remove from the fridge, top with your favourite toppings and enjoy!


    What did you think of this recipe? Did you do anything differently? We’d love to hear from you in the comments below. Don’t forget that you can share all your foodie makes with us using the hashtag #HBivore.


    Follow us on Facebook and like us on Instagram to keep up to date with our latest recipes, news and content. You can also use the form below to receive all our news and free recipes straight to your inbox!

    Written by Amy Northwood
    Her-Bivore
    My passion for food and conservation has led me to where I am now! My aim is to show people that veganism can be diverse, tasty and adapted to fit every lifestyle and budget!
    You can find me on Instagram
    Amy Northwood - Her-Bivore


  3. Has Garnier Gone Cruelty Free?

    Garnier CruletyFree


    As of March 2021 Garnier has announced it has now gone 100% cruelty free! Garnier has pulled its products from China, where animal testing is a required practice for sale of beauty products and has now been awarded the Leaping Bunny by Cruelty Free International.

    Cruelty Free International relies solely on the support of fundraisers and donations to continue their amazing work towards animal liberation so be sure to check out some of the fantastic projects they have achieved and are currently working towards!

    Some of you may have noticed previously that Garnier were trying to appeal to ethical consumers by releasing vegan formulas of some of their products before being instituted with their cruelty-free certification, so it’s a relief to vegans everywhere that they have finally taken the step to becoming an authentic cruelty-free brand and can finally make it back on to people's shopping lists.

    For many people around the world this will make transitioning to vegan beauty products even easier and will allow a lot of people to continue using the brands they have previously. 


    What About Garnier’s Parent Company, L’Oreal?

    Unfortunately despite taking the huge step to pull Garnier products from sale in China, L’Oreal as a parent company continues to make and sell products which cannot be labelled as cruelty free.

    Whilst L’Oreal claims to be at the forefront of anti-animal testing by making previous statments such as "L’Oréal no longer tests any of its products or any of its ingredients on animals, anywhere in the world. Nor does L’Oréal delegate this task to others.", they also state that "An exception could be made if authorities required it for human safety or regulatory purposes.".

    The parent company also hides behind a loophole in animal testing where the raw materials used can be claimed as cruelty-free as long as the testing on animals took place before 2013, a loophole many ethical vegan brands refuse to utilise based on the morals of the companies themselves.

    In order for a product to be considered cruelty free it should meet certain criteria:

    • Does not test its ingredients or products on animals

    • Does not delegate the testing of its ingredients or products to other third parties

    • Does not sell in countries where animal testing is required by law

    Unfortunately, L’Oreal doesn’t meet these criteria!


    So Should We Be Using Garnier?

    By transforming Garnier to Cruelty-free, L’Oreal has taken a huge step towards animal liberation, but they shouldn’t stop there. From my personal perspective there are many amazing, fully vegan and cruelty-free beauty brands in the UK which I will continue to support, but for many people who don’t have access to such brands, Garnier is a fantastic option.

    L’Oreal is not alone in this and many vegan brands are owned by non-vegan parent companies who sell meat, fish, dairy or products which contain non-vegan ingredients or are tested on animals. A few examples are Alpro, owned by Groupe Danone who also own brands such as Actimel and Activia and much loved Linda McCartney brand owned by Hain Celestial that also owns brands like Yorkshire Provender which sells products containing meat.


    The Take Away Point

    It’s important to the vegan movement that we all do our part to support vegan brands and vegan parent companies where we can, but every time you pick up a product with a cruelty free logo on it you take steps towards ending the immense suffering many animals go through daily.

    Encouraging companies to take the leap towards a cruelty free product range is one of the best ways you can help, sending a social media message or an e-mail asking companies to make the change can make a real difference.

    Supporting charities and groups which directly work towards the liberation of the millions of animals used in animal testing is key towards ending the unimaginable suffering animals go through each day.


    Written by Amy Northwood
    Her-Bivore
    My passion for food and conservation has led me to where I am now! My aim is to show people that veganism can be diverse, tasty and adapted to fit every lifestyle and budget!
    You can find me on Instagram
    Amy Northwood - Her-Bivore

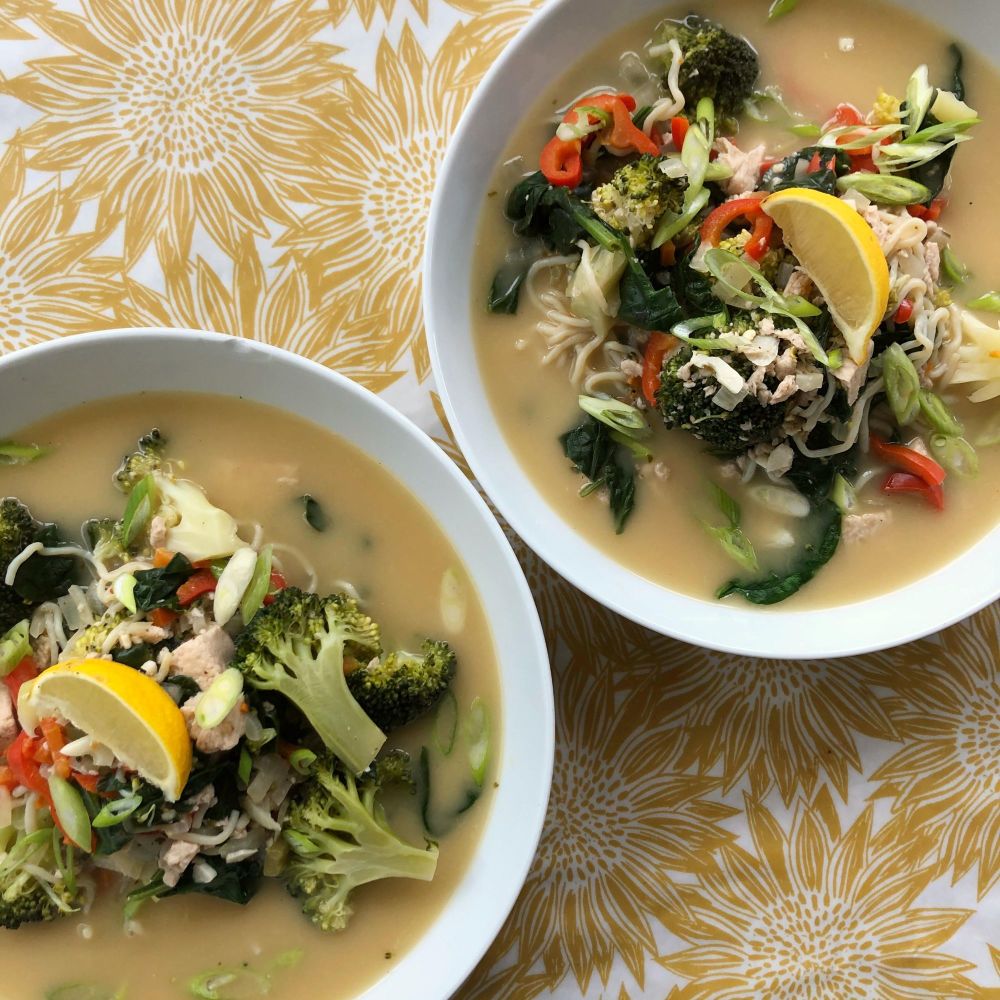
  4. ai noodle soup

    Thai Noodle Soup

    If you’re looking for something warming, filling, packed full of nutrients and calorie friendly, then this is the recipe for you.

    The warming of the lightly spiced soup, with the protein packed tofu and nutrient rich veggies makes this a great all rounder recipe. I use the low calorie protein rice noodles by Bare Naked and it comes out at around 250 calories for a huge portion, that sounds like a total win to me!

    I often like to use the quorn vegan chicken pieces instead of tofu in this, I love the texture they bring and the way they absorb the flavours. If I’m using the chicken pieces instead of tofu, sometimes I fry them off before adding to give a little bit of colour, but this isn't necessary if you’re a little short on time and want to keep the washing up to one pan.

    Whilst on the subject of washing up, can I just make a quick shout out to one pot recipes? One pot to wash for an entire meal sounds like a pretty good win to me, and if you’re only making half the amount for just yourself, you can even eat it straight out the pan with a set of chopsticks and a soup spoon. 

    If you haven’t got any spinach to hand, you can swap that out for some shredded cabbage or bok choy, which both make for a delicious and nutritious meal.ww

    Make sure you let us know in the comments below how yours turned out and if you did anything differently. Also remember to tag us in your foodie makes on instagram!

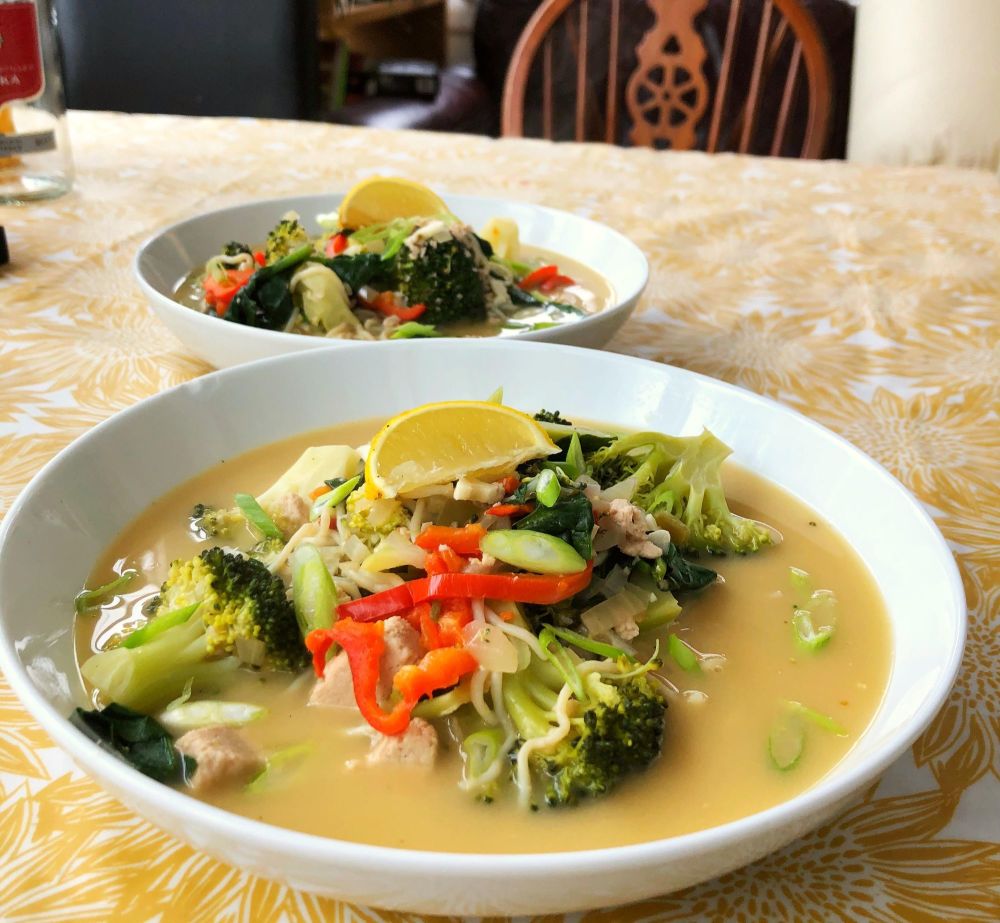
    Thai noodle soup


    Recipe

    Yield: 2 portions

    Total Time: 40 minutes

    Ingredients:

    • 1 tbsp oil (sesame is best)

    • 1/2 inch ginger, peeled and grated

    • 3 cloves garlic, minced

    • 1 white onion, finely diced

    • 2 tsp green thai curry paste

    • 1/2 red bell pepper, sliced

    • 1 1/2 cup broccoli

    • 2 good handfuls spinach

    • 4 cups veg stock

    • 250g rice noodles

    • 200g extra firm tofu or vegan chicken pieces 

    • ½ can coconut milk

    • Lemon wedges, to serve

    • Spring onion slices, to serve


    Method:


    1. Heat the oil in a large pan and gently fry off your onion, garlic and ginger on a medium heat.

    2. Add in your thai green curry paste, followed by your pepper and broccoli and saute for a couple of minutes.

    3. Add in all your stock and turn up to a high heat and bring to a simmer, add in your udon noodles, stir and cover for 5 minutes.

    4. Stir through your coconut milk and add your tofu/chicken pieces and spinach, being careful not to break your tofu too much. Bring to a simmer and allow to cook for s further 5-10 minutes

    5. Serve with a sprinkling of sliced spring onions and a wedge of lemon.


    Written by Amy Northwood
    Her-Bivore
    My passion for food and conservation has led me to where I am now! My aim is to show people that veganism can be diverse, tasty and adapted to fit every lifestyle and budget!
    You can find me on Instagram
    Amy Northwood - Her-Bivore


    What did you think of this recipe? Did you do anything differently? We’d love to hear from you in the comments below. Don’t forget that you can share all your foodie makes with us using the hashtag #HBivore.

    Follow us on Facebook and like us on Instagram to keep up to date with our latest recipes, news and content. You can also use the form below to receive all our news straight to your inbox each week. 

  5. 2 Ingredient Vegan Naan - no yeast!

    bread-5471408_1920

    This recipe is so quick and easy and is made from only two ingredients you’ve probably got in your kitchen right now!

    Naan are a soft, chewy delicious bread originally created over 2,500 years ago in India and it is traditionally baked in a tandoor, or cylindrical clay oven. Now I’m probably not the only one who hasn't for a tandoor hanging around in their kitchen, but worry not as we can create a delicious vegan naan with little more than some enthusiasm and a frying pan!

    Despite the immense climb of vegan food in supermarket chains in recent years, one thing I still find it difficult to source is vegan naans! The only one I'm able to find is a ‘free from’ in tescos that I find to be bitty and of a strange texture. The main reason many naan’s aren;t suitable for vegans is because they contain yoghurt, so it seems pretty easy that we can just swap that out for a vegan yoghurt and be half way there to fresh, warm, homemade vegan naan breads.

    If you’re in a rush, your two ingredients naan’s will go down a treat, but if you’ve got a little more time and a few more ingredients you can create something really special. Brushing your naan’s with a vegan margarine or olive oil once cooked, and topping with some fresh herbs and garlic will create a truly irresistible accompaniment for any indian dish. For a real infusion of flavour you can add some garlic, seasalt or herbs to your mix when combining too.

    Some ideas of additional ingredients that would go great include:

    • Coriander

    • Dried herbs

    • Fresh or dried garlic

    • Olive oil

    • Vegan margarine

    • Additional vegan yoghurt to top

    • Sea salt


    If you’re after a great vegan dish to have these with, check out some of these:


    Make sure you let us know in the comments below how yours turned out and if you did anything differently. Also remember to tag us in your foodie makes on instagram!


    Recipe

    Yield: 2 portions

    Total Time: 35 minutes

    Ingredients:

    • 200g / 1.25 cups self raising flour

    • 200g / 0.8 cups vegan yoghurt

    • Optional: coriander, garlic, dried herbs or oil to top


    Method:


    1. Weigh out you flour in a bowl, then add in your yoghurt. Mix together with a spatula until it comes together then tip out onto a floured surface. If your mix is a little too sticky, now’s the time to add some more flour.

    2. Divide your mix into 4 equal sections using a knife, taking one at a time, roll them out into an oval shape about half a centimeter thick.

    3. Heat up a dry pan on a medium heat, then cook each naan for a couple of minutes on each side until they’re nicely browned

    4. Serve with your favourite dish or enjoy as a delicious snack!


    Written by Amy Northwood
    Her-Bivore
    My passion for food and conservation has led me to where I am now! My aim is to show people that veganism can be diverse, tasty and adapted to fit every lifestyle and budget!
    You can find me on Instagram

    Amy Northwood - Her-Bivore

    What did you think of this recipe? Did you do anything differently? We’d love to hear from you in the comments below. Don’t forget that you can share all your foodie makes with us using the hashtag #HBivore.

    Follow us on Facebook and like us on Instagram to keep up to date with our latest recipes, news and content. You can also use the form below to receive all our news straight to your inbox each week.