Her-Bivore Blog

 RSS Feed

  1. Sweet Potato and Carrot Soup

    Sweet Potato and Carrot Soup

    I recently did my click and collect order with Tesco’s, and only when I got some did I realise I’d ordered twice as many sweet potatoes than I meant to!

    I love sweet potatoes though, so really i just saw this as a bit of an excuse to eat them more. Sweet potatoes are a seriously underrated vegetable. They can make mash, chips, fries, wedges, they can be roasted, made into pizza crust, brownies, used in cake recipes, or even just be used in a soup!

    If you want to check out some other soup recipes before you truly make up your mind, we have plenty to choose from:


    If you have your heart sweet on sweet potato and carrot though, you’ve come to the right place. This recipe is simple yet packed full of nutrition and flavour. The gorgeous depth in the colour makes this a striking dish, perfect for a light meal or paired with some thick cut chunky sourdough for something altogether wholesome.

    If you get to the end of the recipe and you think your soup is a little too thick, simply water it down slightly with some freshly boiled water from the kettle.


    Recipe

    Yield: 4 portions

    Total Time: 30 minutes 

    Ingredients:

    • 2 large white onions, peeled and roughly chopped

    • 2 tbsp olive oil

    • 4 cloves garlic, crushed or minced

    • 600g sweet potatoes, peeled and roughly chopped

    • 400g carrots, peeled and roughly chopped

    • 1.2L vegetable stock


    Method:


    1. In a large pan over a medium heat, fry off your onion until soft and translucent. Add in your garlic and allow to cook for a further 2 minutes.

    2. Add in your sweet potato, carrot and vegetable stock, you want the liquid to be covering the vegetables by about 1 inch, if you need slightly more or less vegetable stock that’s fine!

    3. Bring to the boil and reduce to a simmer, cover and allow to cook for 25-30 minutes, until your sweet potato and carrot are cooked and soft.

    4. Using a stick blender, blend your soup until smooth. Season to taste with salt and pepper divide into bowls and then serve with fresh bread. 


    What did you think of this recipe? Did you do anything differently? We’d love to hear from you in the comments below. Don’t forget that you can share all your foodie makes with us using the hashtag #HBivore.

    Follow us on Facebook and like us on Instagram to keep up to date with our latest recipes, news and content. You can also use the form below to receive all our news straight to your inbox each week. 

    Written by Amy Northwood
    Her-Bivore
    My passion for food and conservation has led me to where I am now! My aim is to show people that veganism can be diverse, tasty and adapted to fit every lifestyle and budget!
    You can find me on Instagram

    Amy Northwood - Her-Bivore

    Get Notified When We Launch...
    • This site is protected by reCAPTCHA and the Google Privacy Policy and Terms of Service apply.

  2. Double chocolate chip muffin

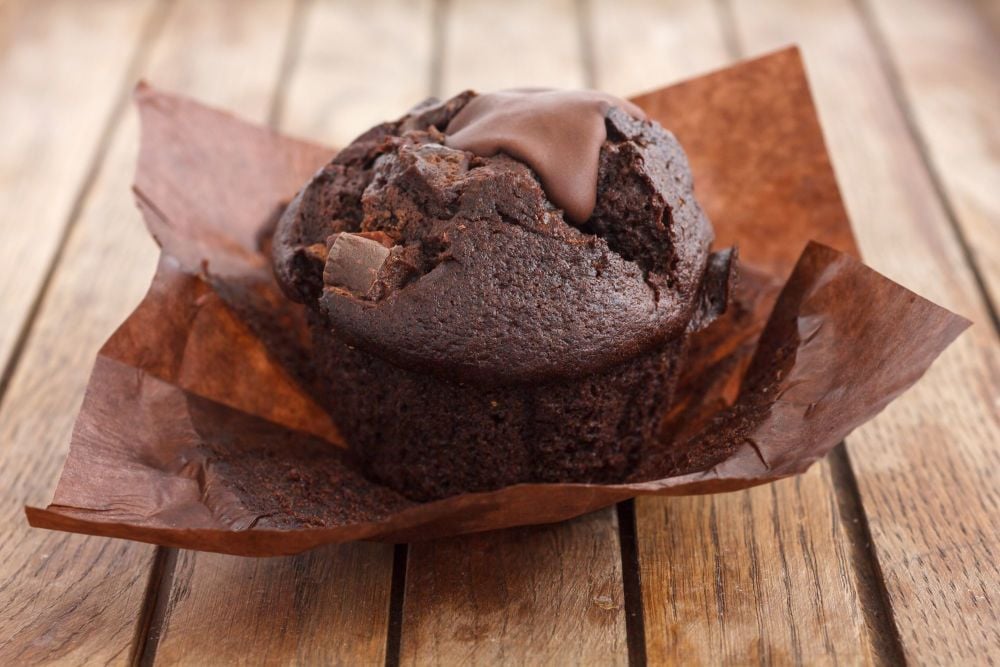
    Double Chocolate Chip Muffins

    The difficulty in baking isn’t choosing to make muffins, that’s sort of a given. There’s never a bad time in life to make muffins. The difficulty comes when you have to decide what flavour to make, and I’m here to make that even more difficult by providing as many muffin recipes as i can think of! From every fruit you can think of, to chocolate chunks or double chocolate chip, I’m going to write it so we can all bake it!

    Choosing a double chocolate chip muffin is always a safe bet. They're indulgently chocolatey and an international favourite. These muffins are soft and light, and no one would even guess they were vegan.

    If you can sneak one while they’re still a little warm you will not believe how amazing they are. Catching it when the chocolate chips are still soft and that perfect little bit melted is insanely good. 

    That said, they’re still just as good once they’ve cooled down, so don’t worry about that! I like to make these for parties or family gatherings, i recently made a huge batch of all my muffin flavours to send to my family during lockdown to cheer everyone up a bit!

    Once you’ve made these, store them in an airtight container once cooler and they’ll stay nice and soft for about 3 days. They’ll be good to eat for longer, but they might go a bit firmer and drier, so it makes a nice excuse to eat a whole batch of muffins in just a few days.

    Let me know how you got on in the comments below, and as always make sure you tag us in all your foodie makes on instagram!


    Recipe

    Yield: 8-10 large muffins

    Total Time: 45 minutes

    Ingredients:

    • 1 cup / 250ml soy milk

    • 2 tbsp lemon juice

    • 1 cup caster sugar

    • â…“ cup sunflower oil

    • 1 1/2 cups cup / 180g plain flour

    • ¼ cup / 35g cocoa powder

    • 2 tsp baking powder

    • ½ tsp bicarbonate of soda (baking soda) 

    • Pinch sea salt

    • 1 cup vegan chocolate chips 


    Method:


    1. Preheat the oven to 180c and fill a 12 hole muffin tray with cases.

    2. In a small bowl, mix your soy milk and lemon juice, set to one side for five minutes to curdle.

    3. Add your sugar and oil and mix until combined

    4. In another bowl mix together your flour, cocoa powder, baking powder, salt and bicarbonate of soda. Add your wet mix to the dry and gently mix together until just combined.

    5. Fold in your chocolate chips (saving some for topping) and then fill your cases to about ¾ full. How many you get will depend on the size of cases you’re using. Top with any leftover chocolate chunks and bake in the oven for 35 minutes or until a cocktail stick inserted into the middle comes out clean.


    What did you think of this recipe? Did you do anything differently? We’d love to hear from you in the comments below. Don’t forget that you can share all your foodie makes with us using the hashtag #HBivore.

    Follow us on Facebook and like us on Instagram to keep up to date with our latest recipes, news and content. You can also use the form below to receive all our news straight to your inbox each week. 

    Written by Amy Northwood
    Her-Bivore
    My passion for food and conservation has led me to where I am now! My aim is to show people that veganism can be diverse, tasty and adapted to fit every lifestyle and budget!
    You can find me on Instagram
    Amy Northwood - Her-Bivore


  3. IMG_3329

    Biscoff Loaf Cake

    Sometimes I think my recipes go a little biscoff-mad, but then I remember how delicious those little accidentally vegan cookies of joy are, and the fact that there’s literally a biscuit flavoured vegan spread, and i quickly remember just why i do so many biscoff-themed recipes.

    You can use biscoff in vegan cheesecakes, bars topped with chocolate, or just about anything you can imagine. 

    If you’re looking for other ideas of how to use up the rest of your jar of biscoff, it goes great on toast or as a topping for pancakes and waffles!

    Back to the recipe at hand though; it’s a pretty easy one to follow, with no weird sounding ingredients. If you're new to the curdled vegan milk idea though, that can sound pretty gross. The actual name for it is vegan buttermilk, and it helps your cake come together and rise. It’s so easy to make, you just have to add a bit of lemon juice to your vegan milk, watch it curdle into a gross looking consistency and then bake it into a delicious cake.

    Another thing to note is when you’re adding the biscoff spread inside the cake for a marbled effect. Make sure you spread it around enough so that it's slightly mixed in. Any chunks of biscoff spread won’t bake on their own and they might leave a little saucy pocket inside your sponge. While a pocket of biscoff spread might sound delicious (and i'm sure it is) it’ll probably make your cake messy and fall apart when you try to cut it.

    Aside from that, this recipe really is a ‘how you like it’ recipe. If you didn’t want the biscoff flavour (although i'm not sure how you got here if you don’t) then you can just leave it out and have this as a plain vanilla sponge. 

    You can also add any other decorations you like on the top, I was torn between whether to add some vegan chocolate chips on top, but I thought I'd give myself a little break from chocolate for once!

    Make sure you let us know in the comments below how yours turned out and if you did anything differently. Also remember to tag us in your foodie makes on instagram!


    Recipe

    Yield: 2

    Total Time: 40 minutes

    Ingredients:

    • ½ cup / 112g vegan margarine

    • 1 cup / 200g caster sugar

    • 1 tsp vanilla extract

    • 2 cups / 250g plain flour

    • 2 tsp baking powder

    • Pinch of salt

    • 1 cup / 240ml of soy milk (almond or oat works too)

    • 1 tbsp lemon juice

    • 2 tbsp biscoff spread + extra for topping (optional)

    • Biscuits to decorate (optional)

    Method:

    1. Line a 9x5 loaf tin with parchment or a paper case, and preheat your oven to 180c

    2. Cream together your margarine and sugar using an electric whisk. Add in your vanilla extract and mix.

    3. In a separate jug or bowl, measure out your soy milk and then add your lemon juice, give it a stir and then leave it to curdle for a couple of minutes.

    4. In the meantime, mix together your plain flour and baking powder and then add these to your mixing bowl. 

    5. Add your curdled milk mix to your other ingredients and allow to mix until just combined.

    6. Pop 2 tbsp of your biscoff spread into a small bowl or ramekin, and microwave for about 20 seconds until runny. 

    7. Transfer half your mix into the loaf tin, the drizzle half your melted biscoff over and use a cocktail stick to drag it through the mix, this will create a nice marbled effect! Then add the rest of your cake mix, and repeat the step, adding the second half of your melted biscoff.

    8. Bake for 40-50 minutes, or until a cocktail stick inserted into the middle comes out clean (remember if you hit any biscoff spread, this might make your cocktail stick look dirty, despite the cake being cooked!).

    9. Remove from the oven and let cool for 10 minutes before transferring to a wire cooling rack and allowing to cool completely.

    10. Once cooled, you can enjoy it as it is or you can spread some extra biscoff spread on the top and decorate however you like with biscuits!


    What did you think of this recipe? Did you do anything differently? We’d love to hear from you in the comments below. Don’t forget that you can share all your foodie makes with us using the hashtag #HBivore.

    Follow us on Facebook and like us on Instagram to keep up to date with our latest recipes, news and content. You can also use the form below to receive all our news straight to your inbox each week. 

    Written by Amy Northwood
    Her-Bivore
    My passion for food and conservation has led me to where I am now! My aim is to show people that veganism can be diverse, tasty and adapted to fit every lifestyle and budget!
    You can find me on Instagram
    Amy Northwood - Her-Bivore

  4.  biscoff bites top view

    Biscoff Cheesecake Bites

    I love a simple recipe, the quicker and easier the better. It doesn’t get much easier than a three ingredient, two step recipe. These are perfect as little treats but can also be a great homemade gift when packaged in a nice box. They look so impressive, no one would guess just how quick and easy they actually were.

    The appearance definitely reminds me of truffles when they’re coated in chocolate, but I think they’re even more delicious. This recipe is also completely kid friendly (to make and eat) so you can get some help from the little ones of the household, but i bet you’ll be stuck doing the washing up!

    Vegan cream cheese is really easy to find nowadays, I used Tesco’s own brand free from cream cheese and it worked amazingly. The biscuits are also generally easy to find, with every supermarket having them in the biscuit aisle. If you’re on a budget though, I find that the biscoff biscuits can always be found in the pound shop, so it’s worth a look to keep this great recipe nice and cheap.

    Any kind of chocolate will work, I used dark chocolate as I didn’t want anything too sweet as they’re definitely sweet enough anyway, but you can use a vegan dark, milk or white chocolate.

    I had a truffle dipper in the house when i first made these, my mum always used to make truffles around christmas time so there was one in the draw. Now that I’m away at university though, I just made do by using a teaspoon to dip them, try and get off as much excess chocolate as you can though to keep them neat and tidy on the bottom!

    When it comes to decorating, the world is your oyster. You can use crushed biscoff biscuits like I did, but there's limitless ways to decorate your bites. You can leave them as they are with the chocolate coating, or you can drizzle with a vegan white chocolate, top with chocolate chips or shavings, use tiny candies, sprinkles or anything else. I’m excited to see what you lot use for yours, so make sure you tell us in the comments below and tag us in your photos on instagram!

     biscoff bites side view


    Recipe

    Yield: 16

    Total Time: 10M

    Ingredients:

    • 250g biscoff biscuits, finely crushed

    • 130g vegan cream cheese 

    • 200g vegan chocolate (for dipping)  

    Method:

    1. Mix your crushed biscuits with your cream cheese, and form into 16 even sized balls.

    2. Gently melt your chocolate, and using a truffle dipper or a teaspoon, dip each one into the chocolate and then place onto baking parchment to set. 

    Decorating tip: Sprinkle with extra biscuit crumbs or sprinkles while still wet, or drizzle with another colour of chocolate once set. 


    What did you think of this recipe? Did you do anything differently? We’d love to hear from you in the comments below. Don’t forget that you can share all your foodie makes with us using the hashtag #HBivore.

    Follow us on Facebook and like us on Instagram to keep up to date with our latest recipes, news and content. You can also use the form below to receive all our news straight to your inbox each week. 


    Written by Amy Northwood
    Her-Bivore
    My passion for food and conservation has led me to where I am now! My aim is to show people that veganism can be diverse, tasty and adapted to fit every lifestyle and budget!
    You can find me on Instagram

    Amy Northwood - Her-Bivore

  5. IMG_2126

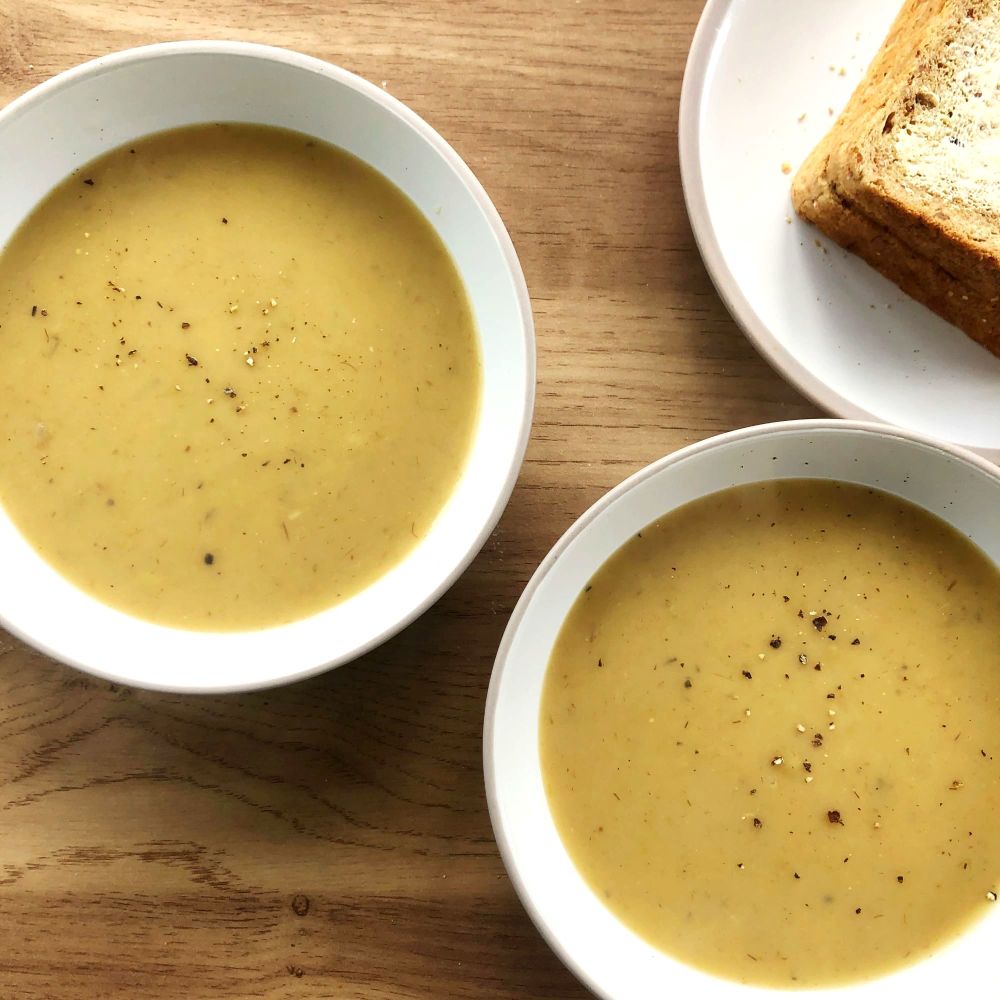
    Leek and Potato Soup

    Soup is a pretty major must have in most households. It’s quick, easy, versatile, freezable and travel friendly. Soup plays a massive role in keeping my morale up when I’m on an ambulance shift. If it’s the middle of winter, minus degrees outside and I’m on a night shift, soup (and coffee) keep me going.

    It’s so easy to take anywhere, you just need a travel thermos and a little cup, then you can have as much or as little at a time as you want.

    Soups are also great because there’s literally unlimited options as to how you can flavour them. Think of all the different vegetables you can think of, and that's probably how many soups you can make (not to mention for each one of those you can add a bit of curry powder and then have a ‘curried’ spicy version of the soup).

    Leek and potato soup holds a special place in my heart though, it’s just so warming and homely. It’s so nutritious and while many people see soups as a light meal, pair this bad boy with some thick cut sourdough and you’ll be so full you need a nap.

    This recipe is so easy, with just a handful of ingredients. 

    I bought my stick blender for less than £10 from Asda, and so far it’s lasted for years (touch wood). If you haven’t got a stick blender, any form of blender or food processor will do the same job.

    Leek and potato is one of those soups I love to have completely smooth, but that doesn’t mean to say that you have to do the same. If you're a chunky soup kind of person, feel free to blend the soup slightly less and have some delicious chunks in yours.

    Another tip I've learned over the years is that you should always season your soup after you've blended it. You’ll have a lot more control over the flavour, and you’ll be able to get a true feel for the taste as you go.

    Make sure you let us know in the comments below how yours turned out and if you did anything differently. Also remember to tag us in your foodie makes on instagram!


    Recipe

    Yield: 2

    Total Time: 40 minutes

    Ingredients:

    • 2 tbsp vegan margarine

    • 3 cloves garlic, crushed
    • 1 medium white onion, chopped

    • 2 large leeks, chopped
    • 5 medium potatoes, peeled and chopped into small chunks

    • 1 good quality veg stock pot

    Method:

    1. Melt your butter in a large pan over a low heat, then turn up to a medium heat and add onion and garlic. Cook until gently caramelised, about 10 minutes.During this time keep scraping the bottom of the pan with your spoon to keep all the flavour moving around.

    2. Add your potatoes, leeks and stock then cover with boiling water from the kettle until all your soup mix is covered, bring back to the boil and then turn down to a simmer and cook for a further 20-30 minutes, or until your potatoes are nice and soft.

    3. Use a stick blender to blend your soup till smooth, you may want to add a little more hot water if you prefer your soup thinner.

    4. Season to taste and serve!


    What did you think of this recipe? Did you do anything differently? We’d love to hear from you in the comments below. Don’t forget that you can share all your foodie makes with us using the hashtag #HBivore.

    Follow us on Facebook and like us on Instagram to keep up to date with our latest recipes, news and content. You can also use the form below to receive all our news straight to your inbox each week. 

    Written by Amy Northwood
    Her-Bivore
    My passion for food and conservation has led me to where I am now! My aim is to show people that veganism can be diverse, tasty and adapted to fit every lifestyle and budget!
    You can find me on Instagram

    Amy Northwood - Her-Bivore