Her-Bivore Blog

 RSS Feed

Category: Snacks

  1. Vegan Hot Cross Buns

    Posted on

    Hot Cross Buns

    Hot Cross Buns

    Make the most of your Easter by filling the house with mouth watering smells of mixed spice, bringing together the homely scents of cinnamon, nutmeg and ginger in this (almost) traditional hot cross bun recipe. I’ve tried to keep the recipe as traditional as possible, but of course with a few vegan twists.

    These sticky glazed classics are sure to be a big hit, so despite being a bit time consuming, they’re worth the time and effort to make!


    Recipe

    Total Time: 2 Hours 30 Minutes

    Servings: 12

    Ingredients:

    • 600g strong white flour
    • 2 tbsp ground mixed spice
    • 45g vegan margarine
    • 150g golden caster sugar
    • Zest of 1 unwaxed lemon
    • 2 tsp fast acting yeast
    • 275ml almond milk
    • 125g mixed dried fruit
    • 2 tbsp apple sauce

    For the crosses:

    • 2 tbsp plain flour
    • 2 tbsp cold water
    • golden syrup

    Method:

    1. Sieve your flour into a large bowl, then add your mixed spice and margarine. Using your hands, rub together until it forms fine breadcrumbs. Add your caster sugar, lemon zest and fast acting yeast. Mix together.

    2. Add your apple sauce and almond milk, then combine until all mixed together. Add the dried mixed fruits into the bowl and work in using your hands.

    3. On a floured surface, knead your dough for about 5 minutes, adding more flour as you need to.

    4. Shape your mix into a ball, and lightly grease a clean mixing bowl with a bit of vegan margarine, then plonk your ball of dough in and cover with a clean tea towel. Leave somewhere warm to prove for 1 hour.

    5. After one hour, remove from the bowl and knock back by kneading for one minute, then place back into the bowl and re-cover with the tea towel. Leave in a warm place to prove for a further 30 minutes.

    6. After this, remove from the bowl and cut your dough in half, then each half into half, then cut each of the 4 sections into three, so you’ll have 12 in total. Shape these into balls and then flatten slightly between the palms of your hands. Place onto baking trays, leaving a small gap between each ball. Cling film loosely but ensuring the edges where the cling film meets the tray are sealed so no air can get in or out. Leave these for a final 30 minutes to prove. Preheat your oven to 230c

    7. Remove the clingfilm and mix your topping flour and water together to form a paste, then pipe the crosses onto the buns with it. Place in the middle of the oven and bake for 10-12 minutes.

    8. When you remove them from the oven, you want to use a pastry brush to spread syrup onto each bun as soon as possible.

    9. Leave to cool for 10 minutes, then transfer onto a cool rack!


    These hot cross buns are perfect to enjoy as they are, or when cooled you can cut in half, grill to toast and spread some vegan margarine on them!

    How did it go? Let us know! Share your foodie makes with us in instagram with #HBivore. 

    Follow us on Facebook and like us on Instagram to keep up to date with our latest recipes, news and content!

    Written by Amy Northwood
    Her-Bivore
    My passion for food and conservation has led me to where I am now! My aim is to show people that veganism can be diverse, tasty and adapted to fit every lifestyle and budget!
    You can find me on Instagram

    Amy Northwood - Her-Bivore

  2. Cinnamon Rolls

    Posted on

    cinnamon rolls


    Is there anything better than the smell of freshly baked cinnamon rolls? There's something about the smell that takes me back to baking away the cold winter evenings with the warmth of the oven and my mother's kitchen advise by my side. These vegan cinnamon rolls are a variation on the bakery classic that everyone can enjoy.

    I know that they take a bit more time than some of my other recipes, but you cannot beat the fresh dough taste with the gooey sweet centre, and what they require in time, they make up for in the simplicity of the ingredients. I tried to keep my recipe as authentic as possible, no seeds, no mashed up bananas, just delicious traditional baking ingredients with a few vegan alternatives.

    These make a great breakfast treat, or even as a snack to keep you going through the day. My mix made 12 but for smaller rolls, you can cut into 15 when you reach step 6.

    Sometimes if I’m really craving that cinnamon taste, i'll increase the amount I use, but I’m a strong believer in the fact that there can never be too much cinnamon!


    Recipe

    Servings:12-15

    Total Time: 2 hours +

    Ingredients:

    Method:

    1. Melt 125g of your butter. Then in a large bowl mix your melted butter, almond milk and caster sugar. Then sprinkle your yeast on top and leave to rise for 5 minutes.

    2. Add 600g of your plain flour and your salt and mix until combined. Cover the bowl with a clean cloth and leave to rise for 1 hour. (The perfect time to make a cup of tea and fit in an episode of your favourite TV series).

    3. After 1 hour, add your remaining 75g of flour. Don’t mix it in, but use it to help you take the dough out of the bowl without it sticking too much.

    4. Place your mix onto a work surface sprinkled with flour, then knead for 30 seconds or until the mix firms up slightly, add more flour as needed to reduce sticking.

    5. Roll your dough out using a rolling pin, you want it to be a roughly 9 x 15 inch rectangle and just under an inch in thickness. Melt your remaining butter and spread it over evenly using a pastry brush, then sprinkle on your brown sugar and cinnamon.

    6. Starting from the longer side, start rolling your cinnamon rolls in one long line. Try to keep your roll fairly tight. Cut into 12 slices and place onto a papered baking tray, roll-side facing up. Cling film and allow to prove for a final 30 minutes.

    7. Bake at 180c for 25-30 minutes, or until golden brown. Leave to cool for 10 minutes and then transfer to a wire cooling rack.

    8. Once completely cooled, drizzle with water icing and they’re all set to go!


    How did it go? Let us know! Share your foodie makes with us in instagram with #HBivore.

    Follow us on Facebook and like us on Instagram to keep up to date with our latest recipes, news and content!

    Written by Amy Northwood
    Her-Bivore
    My passion for food and conservation has led me to where I am now! My aim is to show people that veganism can be diverse, tasty and adapted to fit every lifestyle and budget!
    You can find me on Instagram

    Amy Northwood - Her-Bivore

  3. Teriyaki Crispy Cauliflower Bites

    Posted on

    Teriyaki Cauliflower Bites

    I’d seen a lot of recipes for 'Bang Bang' Cauliflower, and they always looked delicious, albeit a little spicy for some people's preference.

    I wanted to create something a little more pg on the spice rating so that everyone could enjoy them. My tummy was hankering for a Chinese take-away at the time so I naturally gravitated towards a teriyaki recipe!

    Making your own teriyaki sauce comes with a lot of benefits. You know exactly what’s going into it, and many store-bought versions are packed with refined sugars. You can use the sauce section of this recipe whenever you need a top up, but bear in mind that you'll probably want to double or even triple the amount in this recipe if you need more!


    Recipe

    Servings: 1 Bowl

    Total Time: 40M

    Ingredients:

    For the Cauliflower

    • ½ cup plain flour
    • ½ cup corn starch
    • ½ teaspoon salt
    • Soy Milk (or any vegan milk alternative)
    • 1 cauliflower, cut into bite sized florets

    Teriyaki Sauce

    • 1 cup Soy Sauce
    • ¼ cup Maple Syrup
    • 1 tbsp Rice Mirin
    • ½ teaspoon Ground Ginger
    • 1 Clove Garlic, crushed
    • 1 ½ tbsp Corn Starch
    • ¼ cup Water
    • 1 Spring Onion, chopped

    To Garnish

    • Sesame Seeds
    • 1 Spring Onion, chopped

    Method:

    1. Preheat oven to 210c. You’ll need two bowls, in one mix together your flour, corn starch and salt. In the other you just need your soy milk. One by one, dip your cauliflower florets into your milk, then into your flour mix until they are well coated.

    2.  Lay them out on a papered tray, drizzle lightly with oil and then bake for around 30 minutes, turning half way through.

    3. For your sauce, whisk the corn starch with some water to create a paste.

    4. Combine all the other ingredients for the sauce (not the corn starch) and heat gently in a pan. Slowly whisk in your corn starch until the sauce thickens, and then you’re ready!

    5. Pour your sauce over your baked cauliflower, then sprinkle with sesame seeds and chopped spring onion.


    There you have it! We chowed down on these with a Pad Thai that Amy had cooked up alongside and we were suitably stuffed afterwards! (Craving for Chinese food was suitably satisfied as well I might add).

    Obviously, there are other sauces that you can try with this recipe to get the flavour you want. Perhaps a crispy lemon and ginger flavour? Or revert back to the Bang Bang flavour and kick it up a gear with some spice. I'd love to hear your thoughts and what you've tried!

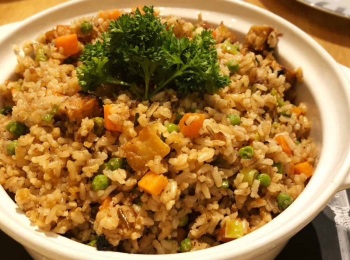
    If you're looking for another recipe to try them alongside with, why not try our Crispy Tofu Fried Rice? We will be uploading Amy's Pad Thai recipe soon enough but if you are craving some Asian Flavour then this is the go-to recipe!

    Crispy Tofu Fried Rice

    On to Crispy Tofu Fried Rice >>

    << Back to Snacks

    Written by Jack Ricketts
    -Him-Bivore
    Marketing has always been my career focus. I am striving to promote a plant-based lifestyle to the masses through positive campaigns and sharing the benefits of veganism. The animals, and the planet, need us more than ever to make a change. 
    You can find me on Instagram

  4. Kale Crisps Recipe

    Posted on

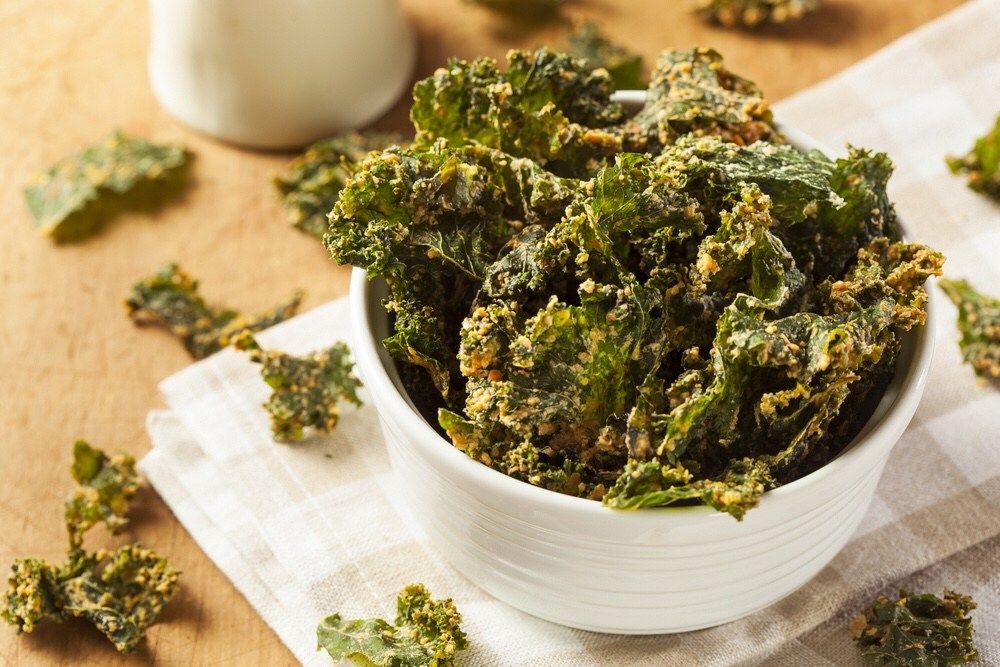
    Kale Crisps

    Kale Crisps

    If you’ve never tried a kale crisp, I can imagine you’re pretty skeptical about this one. You’ve made it onto this page so you’re one step closer to trying your first at the very least!

    Any kale crisp lover will tell you that this delicious and nutritious snack shouldn’t be judged with the myth that kale is boring and only for those ‘super food weirdos’. 

    I’ve opted for the traditional flavoring of just salt, but they could work with many different flavors such as curry, cumin, pepper, paprika, and just about any savory spice you can think of.

    Let me know if you try out any new flavors and how it went in the comments below!

    Recipe

    Total Time: 25M

    Ingredients:

    • 1 Large Bunch Curly Kale (Green or Purple)
    • 3 TBSP Sunflower Oil
    • Salt

    Method:

    • STEP 1: Preheat oven to 100c

    • STEP 2: Rinse your kale under cold running water and then pat dry using a clean kitchen cloth.

    • STEP 3: Using your hands, tear the kale into little crisp sized pieces, you want to avoid using any thick stem as this wont crisp up very well.

    • STEP 4: In a large bowl, add your sunflower oil and a good couple of pinches of salt to your kale and toss until evenly distributed.

    • STEP 5: Lay out on a large baking tray (you might need more than one if you’ve got lots of kale!) and bake for 20-30 minutes or until the kale is crisp and just starting to golden brown around the edges, but try a piece if you’re unsure!

    • STEP 6: Allow to cool before piling up in a bowl of a tub. Always best enjoyed fresh.

    Are you converted?

    See? I wasn't lying to you, they are actually pretty good!

    If you want to get a really good crunch to your kale crisps and lots of other snacks, it might be worthwhile investing in a dehydrator. They help to remove all the excess moisture from the food and keeps them crispy for longer!

    These crisps make a really good side dish as well as a standalone snack. Why not try it out with our baked sweet potato recipe?

    baked sweet potato

    On to Baked Sweet Potato Recipe >>

    << Back to Snacks

    Written by Amy Northwood
    Her-Bivore
    My passion for food and conservation has led me to where I am now! My aim is to show people that veganism can be diverse, tasty and adapted to fit every lifestyle and budget!
    You can find me on Instagram
    Amy Northwood - Her-Bivore

  5. Vegan Jam Tarts Recipe

    Posted on

    Jam Tart

    Jam Tarts

    Jump to Recipe>>

    Jam tarts are such a popular food, I can’t recall ever meeting someone who doesn’t like them, so of course it makes perfect sense to veganise them.

    Finding vegan jam tarts in the supermarkets is one way to get your quick fix, and it might excite you to know that if you're ever in a rush, ASDA own brand jam tarts are labelled vegan!

    Of course, you aren't here to find out where to buy your jam tarts from, no. I know your type, you're here for something all together a bit more special. You're here to find out how to make your very own delicate, crumbly pastry cases filled with whatever jam your heart desires.

    Aside from the obvious reason that homemade tastes 100x better than anything shop bought, these jam tarts also have so few ingredients compared to the shop bought versions which contain about 10 ingredients you can't even pronounce.

    These are one of my go-to for parties and events because they're always so popular, although I always have to check with my mum beforehand because they're so easy to do that she's normally already taken the idea before I can. She always likes to make sure she provides something vegan for me and Jack (Him-Bivore) at family events we attend, and these are popular with vegans and omnis alike. They’re so quick and easy, and will last for 4-5 days in an airtight container (although they never last that long in my house).

    Whilst the theory of jam tarts might seem simple, it's just a delicious pastry case filled with jam, right? 

    Wrong. The hardest choice of jam tarts is choosing your jam. If you're one of these people who has 5 different fancy preserves on the go at once that you picked up at a local market, homemade by your great aunt Betty or even made with the fruits fresh from your garden, your choice will be easy. Simply use them all! You can fill as many or as little of each flavour as you like, but my motto is 'the more variety the better'. 

    If you're like me, who is currently sharing a house with four other students, you probably don't have room for the selection of fine jams you wish you could have, so you and I have to just use one jar at a time (admittedly I've currently got two on the go, a strawberry and a cherry, but I'm not too sure how I got into that situation). Whatever jam you've chosen will work perfectly fine. Sweet jams though please, I can't promise how your savoury tomato jam would turn out in this. 

    The next jam on my list is pineapple, I wasn't aware it existed till I spotted it from across the room in a friends cupboard, and ever since I've been wanting to try it in this recipe.

    Size wise you can either choose to use individual tart tins like I did, or holes in a cupcake tin work too, although they don't turn our quite so pretty! One tip to always remember is DO NOT OVER FILL! The jam bubbles up, so you don't want more than just a small layer of jam otherwise you'll have a jammy mess when you remove them from the oven.

    Whichever jam and size you choose, let me know in the comments below how it worked out! As always, tag us in your instagram posts of any of our recipes you make!


    Recipe

    Servings: 12

    Total Time: 45M

    Ingredients:

    • 250g/ 2 cups Plain Flour
    • 125g/ 0.5 cups Vegan Margarine
    • Water
    • Jam of Your Choice!

    Method:

    • STEP 1: Preheat your oven to 180c. In a bowl, rub your margarine and flour together until it resembles thick breadcrumbs. Add 2 tablespoons of water and gently knead to bring the ingredients together. If its not staying together, add a little more water, but be careful not to add too much!

    • STEP 2: On a lightly floured surface, roll out your dough till its about 1/4 of a centimeter thick, then use a kinife  to cut out pastry sections big enough to fit the holes in your tart tin, with a little extra. You don't want to be pulling your pastry to fit, otherwise it'll shrink in the oven.

    • STEP 3: Gently press the circles into the tart tins one by one unntil they're all filled

    • STEP 4: Fill your pastry cases with your jam. I used 3 inch tins and they needed a heaped tablespoon of jam each, but make sure your tins only have a thin layer of jam on them.

    • STEP 5: Bake for about 18 minutes or until golden brown, the filling should be gently bubbling. Remove from the oven and allow to cool for a few minutes before transferring to a cooling rack.

    What do you think?

    We'd love to know what you filled your pastry cases with! If you wanted to get real fancy with them, you could top them with fresh fruit, making them perfect for dinner parties!

    Jack and I have had a bit of a debate over this recipe, however, about the optimum level of jam for each tart. I say 2 teaspoons, Jack seems to think 2 tablespoons, arguing that "you can never have too much jam". Does anyone else want to weigh in on this?

    If you love pastry like we do, you should check out our Apple Turnovers recipe! They're also great for taking on a picnic and if you are looking for more of a challenge, these fit the bill!

    Apple Turnovers

    On to Apple Turnovers Recipe >>

    <<Back to Recipes

    Written by Amy Northwood
    Her-Bivore
    My passion for food and conservation has led me to where I am now! My aim is to show people that veganism can be diverse, tasty and adapted to fit every lifestyle and budget!
    You can find me on Instagram

    Amy Northwood - Her-Bivore